
进入正题
一、事前准备:
1.设备
一台Linux服务,Ubuntu 16.04.1 LTS 32位
2.LAMP介绍
啰嗦几句给入门的小白
L->linux,服务器的系统(其他的有windows server等等 Ubuntu只是linux的镜像,形如单机游戏的各种DEMO,其他的还有 centOS等等)
A->apache,服务器软件(开启服务器软件才能’服务’,其他的还有nginx等等)
M->MySQL,数据库软件(不多介绍,sqlserver,MongoDB,Redis等等)
P->php,做后端的脚本语言(语言只是工具,这里我们选‘世界上最好的语言’,Java,nodejs,Python,C/C++都可以)
二、开始干活
1.安装LAMP需要的各种软件
安装LAMP的软件首先我们要进入服务器,通过SSH我们远程连接服务器
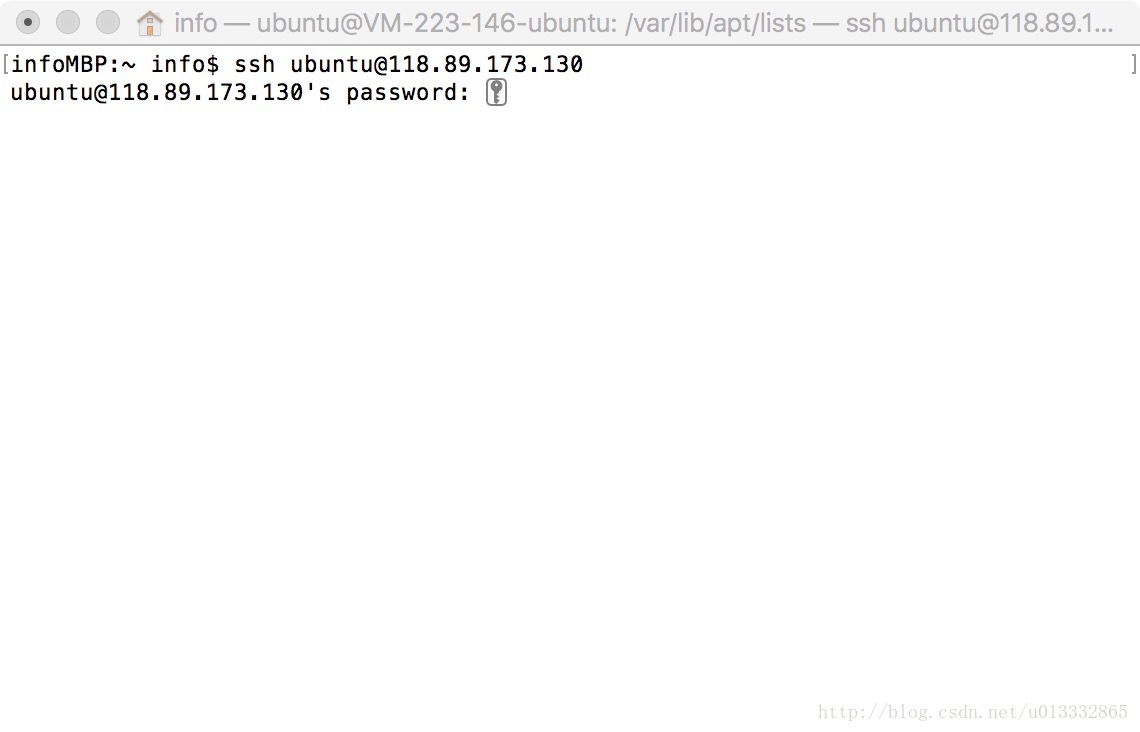
输入密码之后进入服务器界面
ubuntu有自带的包管理工具,鉴于新买的服务器我们先更新一下
命令:sudo apt-get update这里需要管理员权
结果如下:
Hit:1 http://mirrors.tencentyun.com/ubuntu xenial InRelease
Hit:2 http://mirrors.tencentyun.com/ubuntu xenial-security InRelease
Hit:3 http://mirrors.tencentyun.com/ubuntu xenial-updates InRelease
Reading package lists... Done
Done 即完成
2.1.安装apache
命令sudo apt-get install apache2(apache现在是2.0以上的版本,这是骗人的,真正原因是因为环境导致我们需要用2进制的文件)
当你看到
Processing triggers for libc-bin (2.23-0ubuntu3) ...
Processing triggers for systemd (229-4ubuntu10) ...
Processing triggers for ureadahead (0.100.0-19) ...
Processing triggers for ufw (0.35-0ubuntu2) ...
great!安装好了
输入命令apachectl -v
可以看到当前的apache版本:
Server version: Apache/2.4.18 (Ubuntu)
2.2.安装PHP
sudo apt-get install php
同样,看到
Creating config file /etc/php/7.0/fpm/php.ini with new version
Setting up php7.0 (7.0.18-0ubuntu0.16.04.1) ...
Setting up php (1:7.0+35ubuntu6) ...
Processing triggers for systemd (229-4ubuntu10) ...
Processing triggers for ureadahead (0.100.0-19) ...
就是安装完成了
(apt-get 现在已经默认安装PHP7 如需要其他版本可以更换源,或者去自行下载需要的PHP版本源码编译)
用命令php -v可以查看当先PHP版本
ubuntu@VM-223-146-ubuntu:~$ php -v
PHP 7.0.18-0ubuntu0.16.04.1 (cli) ( NTS )
Copyright (c) 1997-2017 The PHP Group
Zend Engine v3.0.0, Copyright (c) 1998-2017 Zend Technologies
with Zend OPcache v7.0.18-0ubuntu0.16.04.1, Copyright (c) 1999-2017, by Zend Technologies
2.3.安装mysql
这里分两步先安装mysql-server
sudo apt-get install mysql-server
安装过程中你会看到
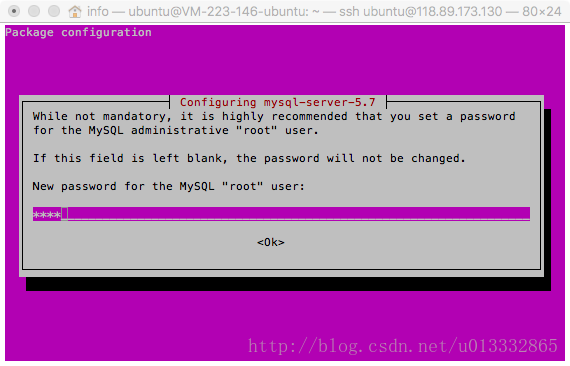
这里是让你输入默认的mysql密码,输入之后 按回车(ok是不能点的)
接着会看到
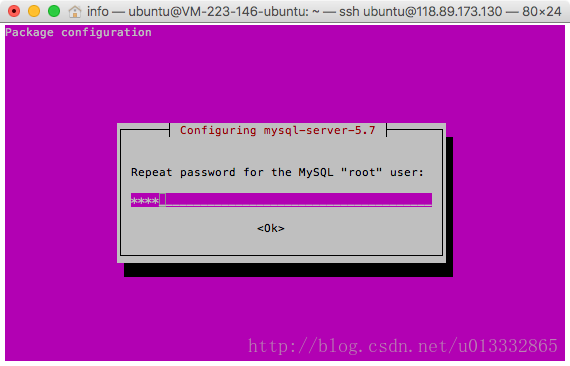
确认密码。输入之后按回车。
老规矩,当你看到
Processing triggers for libc-bin (2.23-0ubuntu3) ...
Processing triggers for systemd (229-4ubuntu10) ...
Processing triggers for ureadahead (0.100.0-19) ..
就是安装OK了。
接着我们安装mysql-client
server是服务
client是客户端,我们可以直接操作SQL语言的
命令sudo apt-get install mysql-client
不出意外秒装,都不用滚屏
试着登陆一下数据库
命令mysql -u root -p
接着会让我们输入密码,输入密码之后按回车即可进入mysql-client
ubuntu@VM-223-146-ubuntu:~$ mysql -u root -p
Enter password:
Welcome to the MySQL monitor. Commands end with ; or \g.
Your MySQL connection id is 11
Server version: 5.7.18-0ubuntu0.16.04.1 (Ubuntu)
Copyright (c) 2000, 2017, Oracle and/or its affiliates. All rights reserved.
Oracle is a registered trademark of Oracle Corporation and/or its
affiliates. Other names may be trademarks of their respective
owners.
Type 'help;' or '\h' for help. Type '\c' to clear the current input statement.
mysql>
这里我们就可以跑sql了别忘了’;’结束,回车执行,没有’;’会换行
test:
mysql> show databases;
+--------------------+
| Database |
+--------------------+
| information_schema |
| mysql |
| performance_schema |
| sys |
+--------------------+
4 rows in set (0.00 sec)
mysql>
mysql的退出命令:exit无视分号
mysql> exit
Bye
三、万只具备只欠东风,搭建服务器
其实到了这一步,Apache已经在运行了。不信你在地址栏输入服务器的IP
会看到:
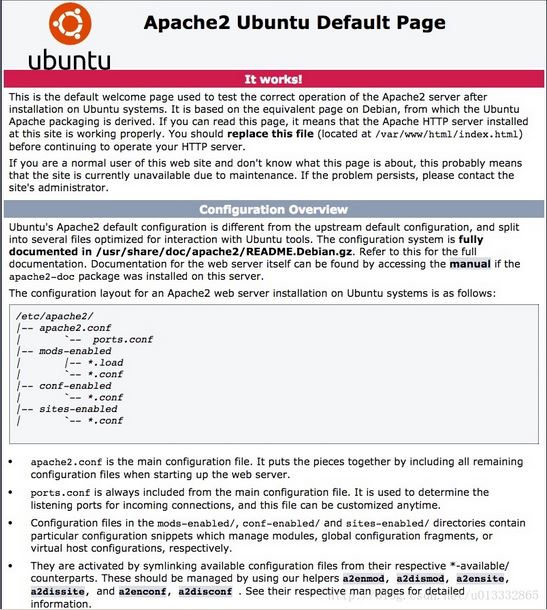
加粗部分是重点:
replace this file (located at /var/www/html/index.html)
以后默认的网站的根目录就是/var/www/html/
apache会默认去找index.html
下面是配置文件的位置信息
/etc/apache2/
|-- apache2.conf
| `-- ports.conf
|-- mods-enabled
| |-- *.load
| `-- *.conf
|-- conf-enabled
| `-- *.conf
|-- sites-enabled
| `-- *.conf
让我们修改一下/var/www/html/index.html玩玩
话说没有直观的编辑器你们还习惯么,来个VIM编辑器吧。
命令:apt-get install vim
然后修改文件权限,命令sudo chmod 777 /var/www/html/index.html
然后我们用命令 vim /var/www/html/index.html打开文件去编辑
具体VI买的使用方法不再赘述。
‘沉迷于学习无法自拔,学会用搜索工具也是码农的必备,baidu/google/bing/sougou之’
让我们奋笔疾书:
<html>
<head>
</head>
<body>
<h1>hello world!</h1>
</body>
</html>
保存&&刷新刚才的浏览器页面。
apache是把PHP以当做模块来加载,所以首先我们要修改Apache的配置文件。
不出意外看到 大写的 hello world
让我们新建一个PHP文件 index.php,在此之前让我们修改文件夹的权限
ubuntu@VM-223-146-ubuntu:/var/www/html$ cd ..
ubuntu@VM-223-146-ubuntu:/var/www$ sudo chmod -R 777 html/
第一行回到上层文件夹
第二行修改文件夹的权限
然后我们进入html文件夹cd html用命令vim index.php 即可新建并打开文件
内容
<?php
phpinfo();
?>
保存退出
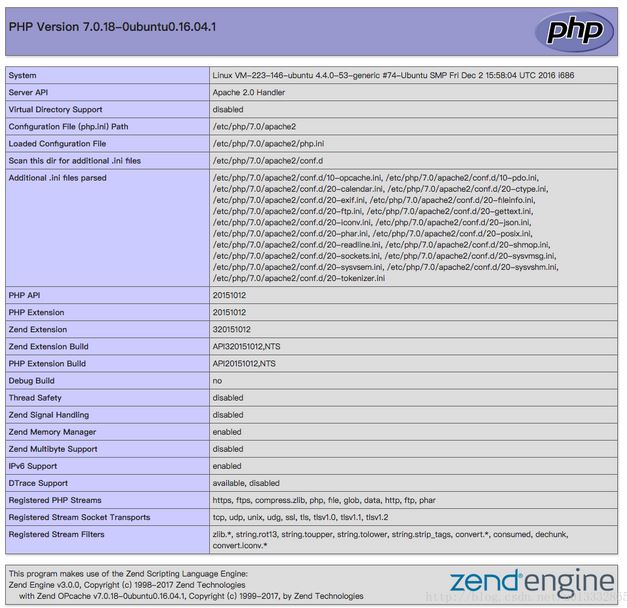
浏览器输入 xxx.xxx.xxx.xxx/index.php
是不是发现php脚本没有被解析?
是的,php是作为一个模块呗apache加载的。
打个比方,没有集成声卡的主板,这时候要买个一声卡手动插上到主板上去,然后下载驱动才可以让电脑有声音。
这里apache即为主板
PHP为声卡
让Apache加载PHP模块,即为安装驱动,这个驱动名字为‘libapache2-mod-php7.0’
我们通过 sudo apt-get instal libapache2-mod-php7.0 完成安装。然后刷新浏览器即可看到PHP的信息
接下来让我们试试MYSQL
修改index.php 我们用脚本连接数据库
首先创建一个数据库再加几张表
mysql> create database test;
Query OK, 1 row affected (0.00 sec)
mysql> use test;
Database changed
mysql> CREATE TABLE `userinfo` (
-> `userID` int(10) NOT NULL AUTO_INCREMENT PRIMARY KEY,
-> `username` varchar(32),
-> `age` int(11) );
Query OK, 0 rows affected (0.17 sec)
修改index.php文件:
<?php
class DB{
protected $db;
public function __construct(){
try {
$this->db = new PDO("mysql:host=localhost;dbname=test;charset=utf8mb4","root","root");
$this->db->setAttribute(PDO::ATTR_DEFAULT_FETCH_MODE,PDO::FETCH_ASSOC);
$this->db->setAttribute(PDO::ATTR_EMULATE_PREPARES, false); //禁用prepared statements的仿真效果
date_default_timezone_set('Asia/Shanghai');
} catch (PDOException $error) {
echo 'Connection failed: ' . $error->getMessage();
die();
}
}
public function insertDB($name,$age){
$sql = $this->db->prepare('INSERT INTO userinfo (username,age)VALUES(?,?)');
$sql->bindParam(1,$name);
$sql->bindParam(2,$age);
return $sql->execute();
}
}
$db = new DB();
echo $db->insertDB('info',24);
?>
保存刷新浏览器
会显示 Connection failed:no driver
这表示PHP在链接mysql的过程中因为没有安装连接mysql的PHP扩展
用命令安装MySQL的扩展:sudo apt-get install php-mysql
tips: PDO
简单来说他只是提供了统一的连接方式,并不提供扩展,所以连接什么数据库就要装对应的扩展
安装之后,重启Apache:sudo apachectl restart
如果出现AH00558: apache2: Could not reliably determine the server's fully qualified domain name, using 127.0.0.1. Set the 'ServerName' directive globally to suppress this messag
是因为默认的apache.conf没有设置servername
只需修改配置文件在最后加上 ServerName localhost:80 即可。不是重点BUG,这里先不做修改。
重启Apache之后刷新浏览器 会显示一个1,这表示脚本运行成功,并且把数据插入了数据库。
去数据库看看吧
登陆数据库,不做介绍
mysql> use test
Reading table information for completion of table and column names
You can turn off this feature to get a quicker startup with -A
Database changed
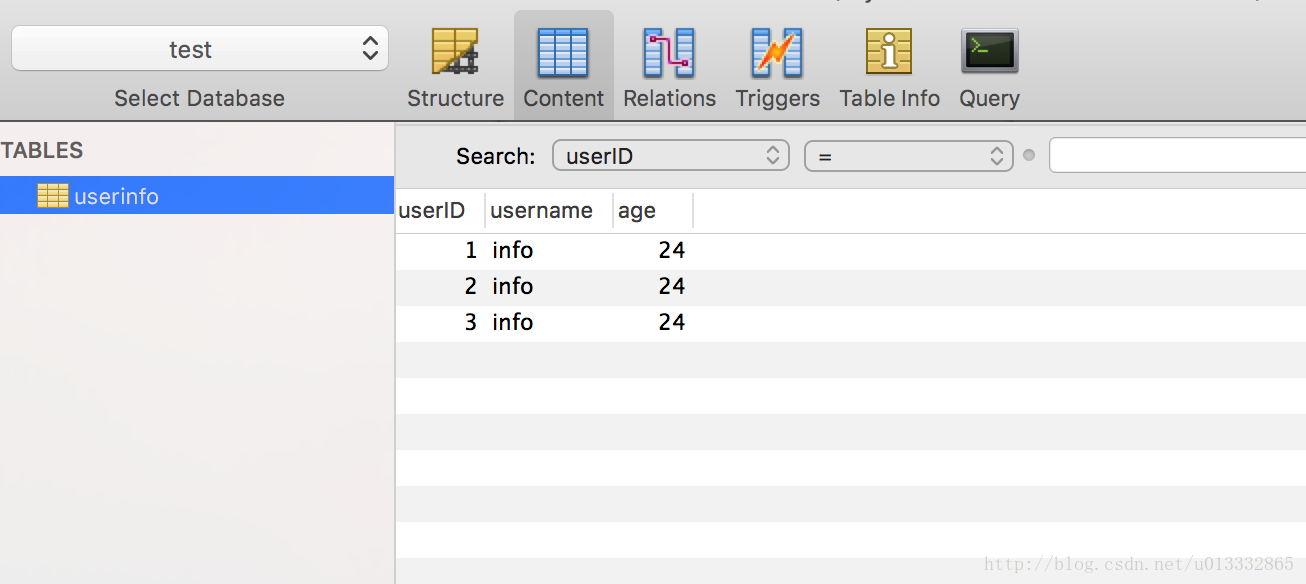
mysql> select * from userinfo;
+--------+----------+------+
| userID | username | age |
+--------+----------+------+
| 1 | info | 24 |
+--------+----------+------+
1 row in set (0.00 sec)
毫无疑问,数据插入成功。
至此LAMP搭建已经成功了。
聊点别的。
1.远程登录服务器
如果是在终端(命令行)登录你可以使用SSH,windows用户也可以使用 putty。
如果是可视化的登录,这里我是mac所以用yummyFTP举例
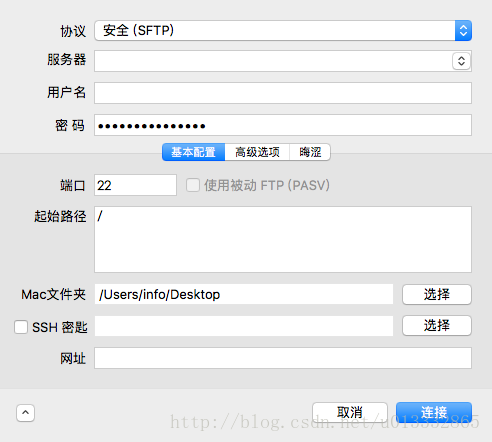
首先是协议要注意 是STFP
其次是端口是22
究其原因是因为官网文档是这样,每个服务商提供的不一样 阿里云的端口为21
2.远程登陆数据库
有一部分用户习惯于用可视化的软件登录数据库,比如有些PM在做报表的时候
本次的服务器其实是不支持远程登录的,因为略有规模的网站,数据库和服务器是分开的,因为数据库容易达到瓶颈,所以为什么会有DBA这一职业。
而本次的数据库如果要开启远程登录,无非是让一个用户可以凭借指定的用户名密码在指定的IP可以登录数据库。
所以我们要先进入数据库创建这样一个用户
mysql -u root -p
Enter password:
Welcome to the MySQL monitor. Commands end with ; or \g.
Your MySQL connection id is 6
Server version: 5.7.18-0ubuntu0.16.04.1 (Ubuntu)
Copyright (c) 2000, 2017, Oracle and/or its affiliates. All rights reserved.
Oracle is a registered trademark of Oracle Corporation and/or its
affiliates. Other names may be trademarks of their respective
owners.
Type 'help;' or '\h' for help. Type '\c' to clear the current input statement.
选择mysql数据库
mysql> use mysql
Reading table information for completion of table and column names
You can turn off this feature to get a quicker startup with -A
Database changed
创建一个用户
mysql> GRANT ALL PRIVILEGES ON 数据库.表名 TO '用户名'@'%'IDENTIFIED BY '密码' WITH GRANT OPTION;
把“数据库.表名”替换为’*.*’ 即为所有的数据库和数据表都有’ALL PRIVILEGES‘权限即所有的权限。
把’用户名‘和’密码‘替换为你用来远程登录的账号密码。
然后运行
mysql> FLUSH PRIVILEGES;
Query OK, 0 rows affected (0.00 sec)
让权限生效。
接着要修改mysql的配置文件,因为默认的配置文件中已经绑定了固定的地址才可以登录
退出之后用管理员打开配置文件
sudo vim /etc/mysql/mysql.conf.d/mysqld.cnf
大概在43行位置在bind-address之前加上#注释
#bind-address = 127.0.0.1
保存退出
重启mysql/etc/init.d/mysql restart
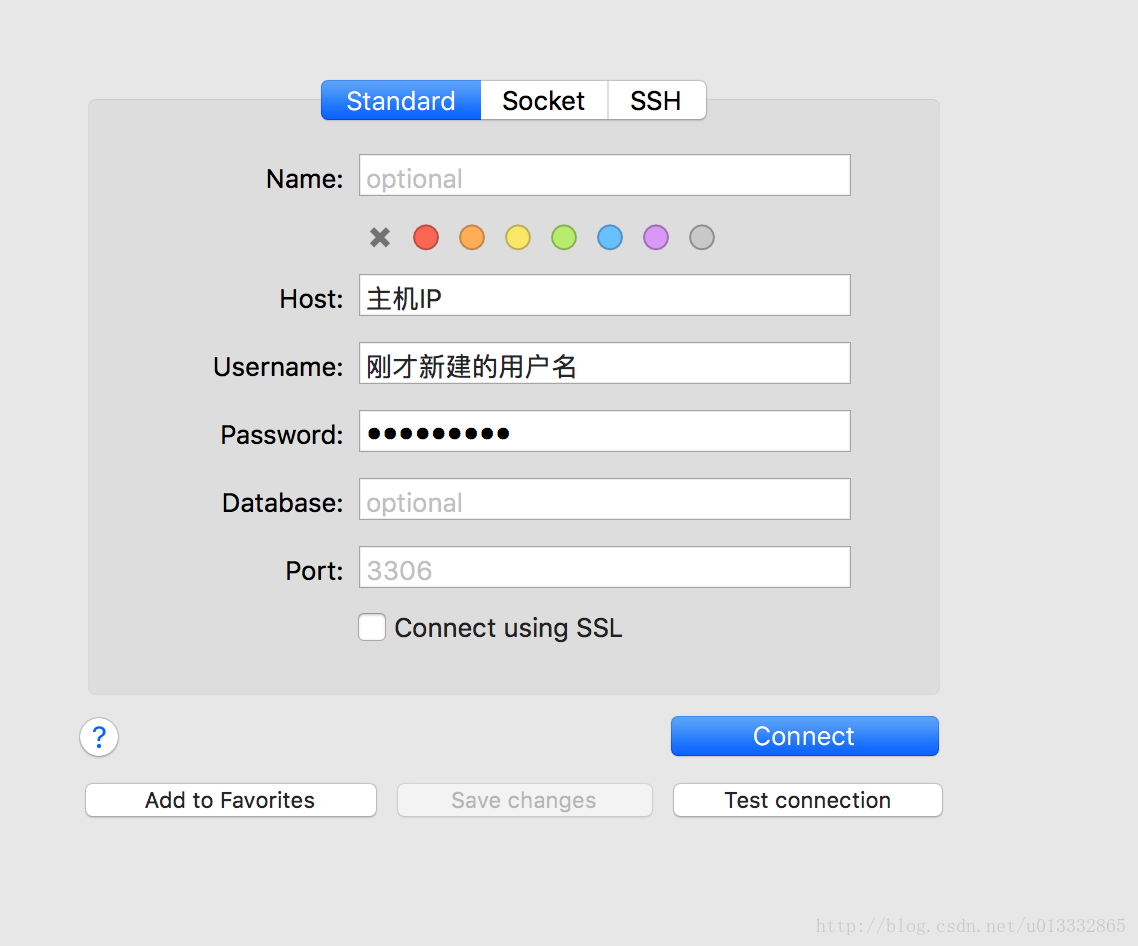
ok 不出意外你可以远程登录数据库了,这里使用MAC下的 Sequel Pro 来登录
至此LAMP+远程登录就结束了。开启你的programmer之旅吧。