
LAMP 方案是一系列自由和开源软件的集合,包含了 Linux、Web 服务器 (Apache)、 数据库服务器 (MySQL / MariaDB) 和 PHP (脚本语言)。LAMP 是那些需要安装和构建动态网页应用的基础平台,比如WordPress、Joomla、OpenCart 和 Drupal。
在这篇文章中,我将描述如何在 Ubuntu Server 16.04 LTS 上安装 LAMP,众所周知 Ubuntu 是一个基于 Linux 的操作系统,因此它构成了 LAMP 的第一个部分,在接下来的操作中,我将默认你已经安装了 Ubuntu Server 16.04。
Apache2 web 服务器的安装:
在 Ubuntu linux 中,web 服务器是 Apache2,我们可以利用下面的命令来安装它:
linuxtechi@ubuntu:~$ sudo apt update
linuxtechi@ubuntu:~$ sudo apt install apache2 -y
当安装 Apache2 包之后,Apache2 相关的服务是启用的,并在重启后自动运行。在某些情况下,如果你的 Apache2 服务并没有自动运行和启用,你可以利用如下命令来启动和启用它。
linuxtechi@ubuntu:~$ sudo systemctl start apache2.service
linuxtechi@ubuntu:~$ sudo systemctl enable apache2.service
linuxtechi@ubuntu:~$ sudo systemctl status apache2.service
如果你开启了 Ubuntu 的防火墙(ufw),那么你可以使用如下的命令来解除 web 服务器的端口(80和443)限制
linuxtechi@ubuntu:~$ sudo ufw status
Status: active
linuxtechi@ubuntu:~$ sudo ufw allow in 'Apache Full'
Rule added
Rule added (v6)
linuxtechi@ubuntu:~$
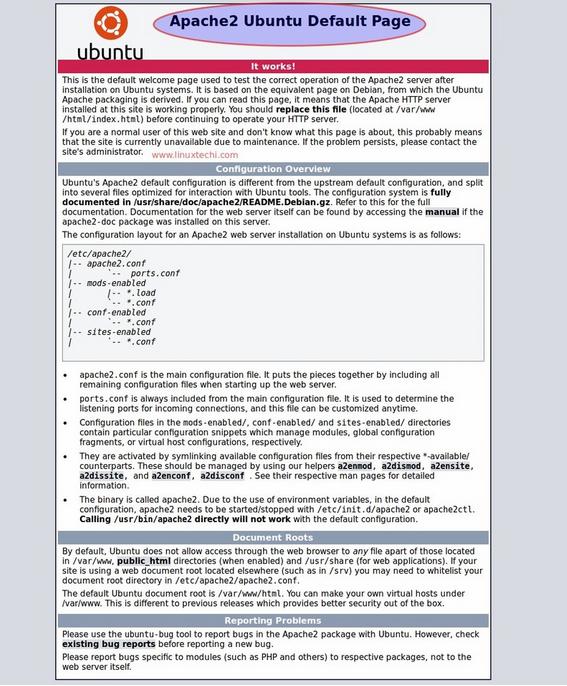
现在开始访问你的 web 服务器 :
打开浏览器并输入服务器的IP地址或者主机名(http://IP_Address_OR_Host_Name),在我的例子中我的服务器 IP是‘192.168.1.13’
数据库服务器的安装 (MySQL Server 5.7) :
MySQL 和 MariaDB 都是 Ubuntu 16.04 中的数据库服务器。 MySQL Server 和 MariaDB Server的安装包都可以在Ubuntu 的默认软件源中找到,我们可以选择其中的一个来安装。通过下面的命令来在终端中安装mysql服务器。
linuxtechi@ubuntu:~$ sudo apt install mysql-server mysql-client
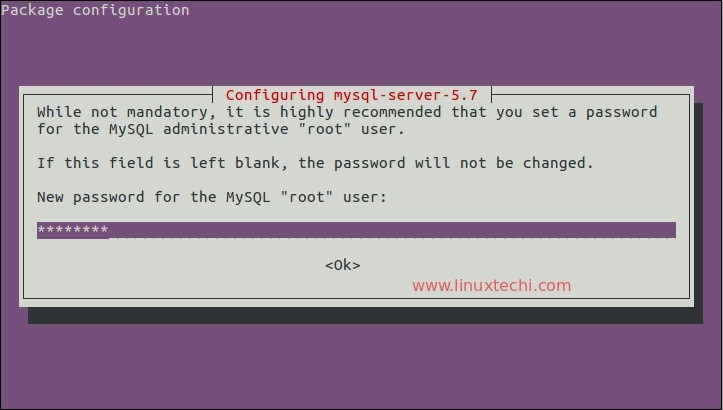
在安装过程中,它会要求你设置 mysql 服务器 root 帐户的密码。
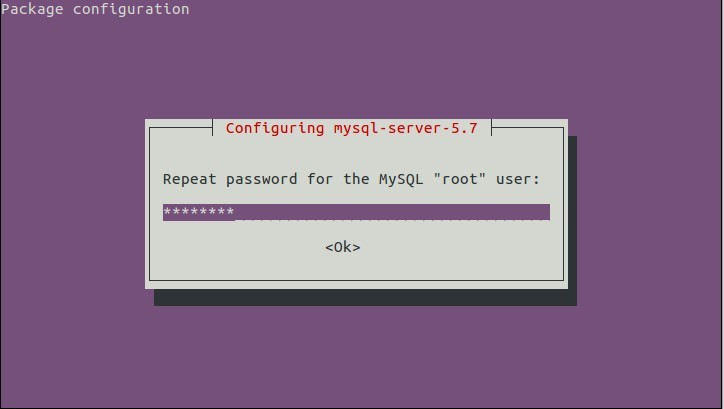
确认 root 帐户的密码,并点击确定。
MySQL 服务器的安装到此已经结束了, MySQL 服务会自动启动并启用。我们可以通过如下的命令来校验 MySQL 服务的状态。
linuxtechi@ubuntu:~$ sudo systemctl status mysql.service
MariaDB Server的安装:
在终端中使用如下的命令来安装 Mariadb 10.0 服务器。
linuxtechi@ubuntu:~$ sudo apt install mariadb-server
运行如下的命令来设置 MariaDB root 帐户的密码,还可以用来关闭某些选项,比如关闭远程登录功能。
linuxtechi@ubuntu:~$ sudo mysql_secure_installation
PHP 脚本语言的安装:
PHP 7 已经存在于 Ubuntu 的软件源中了,在终端中执行如下的命令来安装 PHP 7:
linuxtechi@ubuntu:~$ sudo apt install php7.0-mysql php7.0-curl php7.0-json php7.0-cgi php7.0 libapache2-mod-php7.0
创建一个简单的 php 页面,并且将它移动到 apache 的文档根目录下 (/var/www/html)
linuxtechi@ubuntu:~$ vi samplepage.php
<?php
phpinfo();
?>
在 vi 中编辑之后,保存并退出该文件。
linuxtechi@ubuntu:~$ sudo mv samplepage.php /var/www/html/
现在你可以从 web 浏览器中访问这个页面, 输入 : “http://<Server_IP>/samplepage.php” ,你可以看到如下页面。
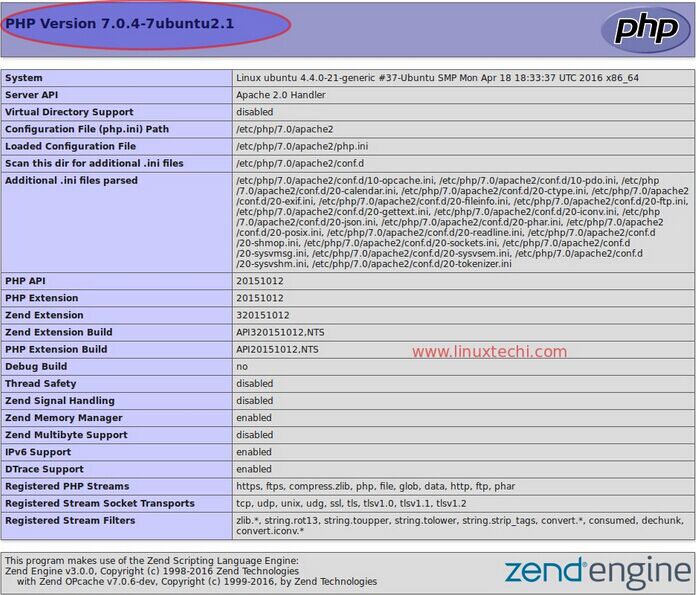
以上的页面向我们展示了 PHP 已经完全安装成功了。
phpMyAdmin 的安装:
phpMyAdmin 可以让我们通过它的 web 界面来执行所有与数据库管理和其他数据库操作相关的任务,这个安装包已经存在于 Ubuntu 的软件源中。
利用如下的命令来在 Ubuntu server 16.04 LTS 中安装 phpMyAdmin。
linuxtechi@ubuntu:~$ sudo apt install php-mbstring php7.0-mbstring php-gettext
linuxtechi@ubuntu:~$ sudo systemctl restart apache2.service
linuxtechi@ubuntu:~$ sudo apt install phpmyadmin
在以下的安装过程中,它会提示我们选择 phpMyAdmin 运行的目标服务器。
选择 Apache2 并点击确定。

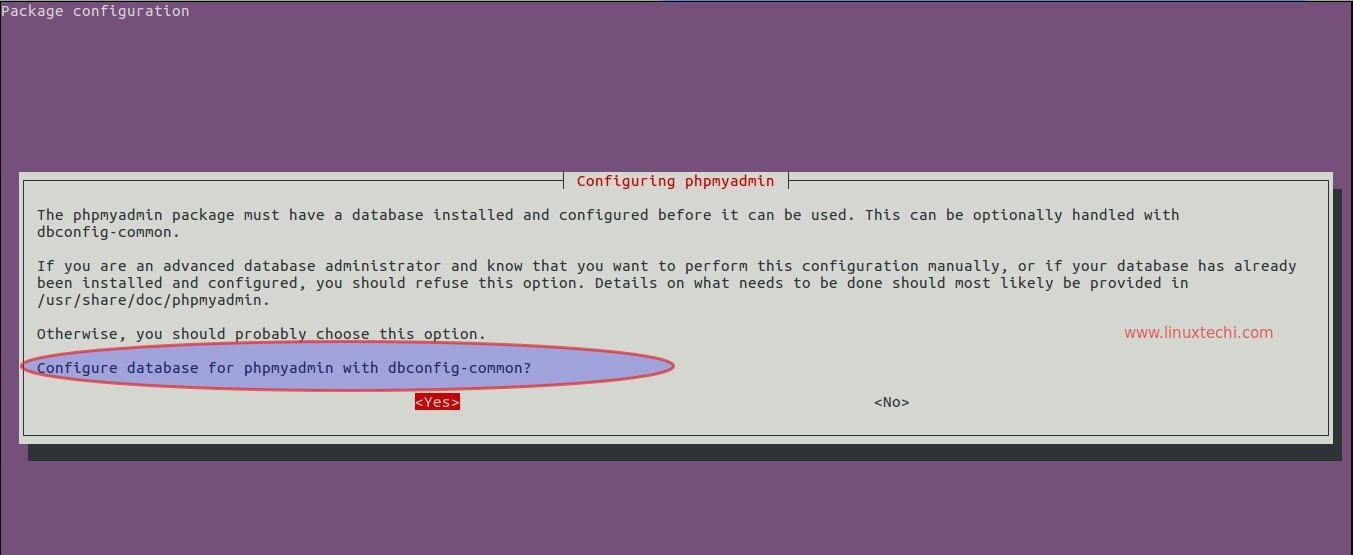
点击确定来配置 phpMyAdmin 管理的数据库。
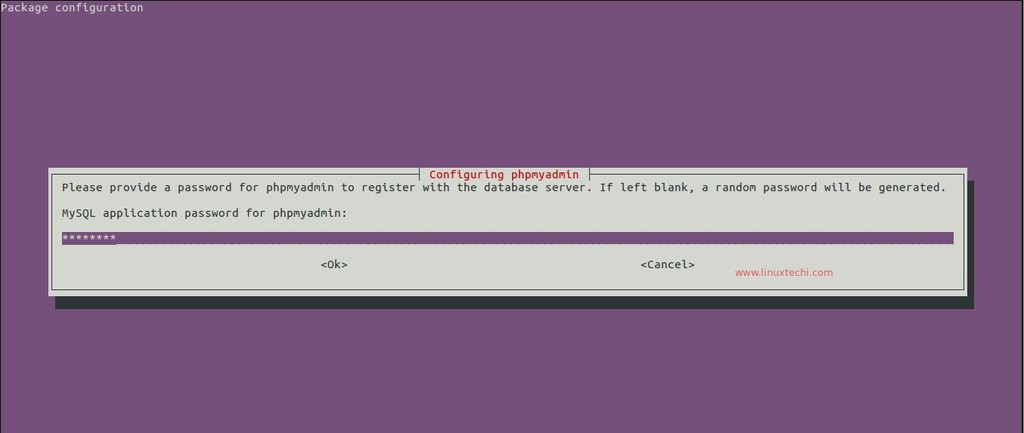
指定 phpMyAdmin 向数据库服务器注册时所用的密码。
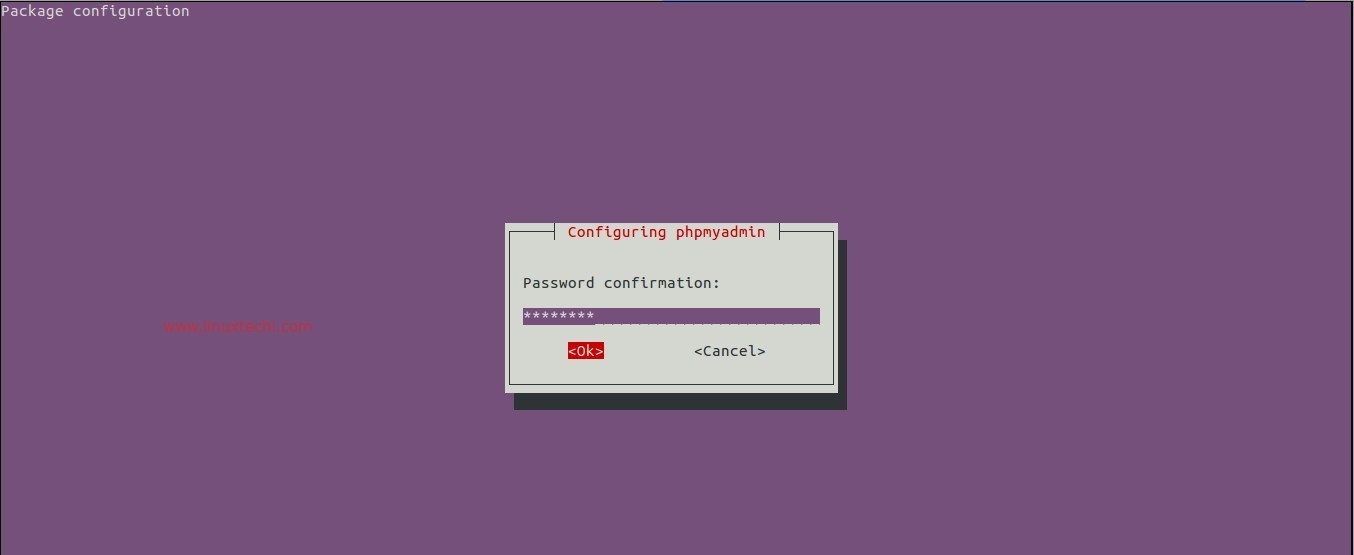
确认 phpMyAdmin 所需的密码,并点击确认。
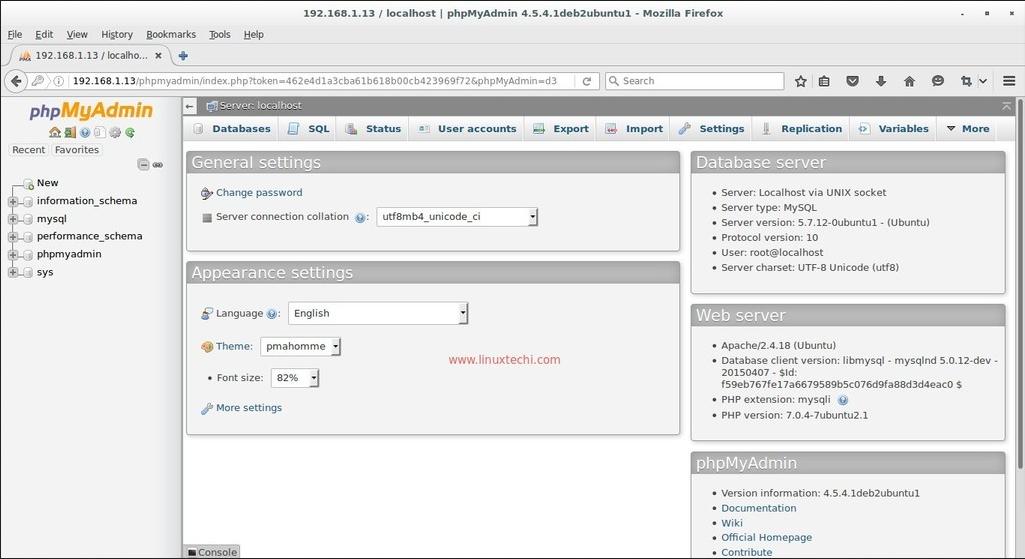
现在可以开始尝试访问 phpMyAdmin,打开浏览器并输入 : “http://Server_IP_OR_Host_Name/phpmyadmin”
使用我们安装时设置的 root 帐户和密码。
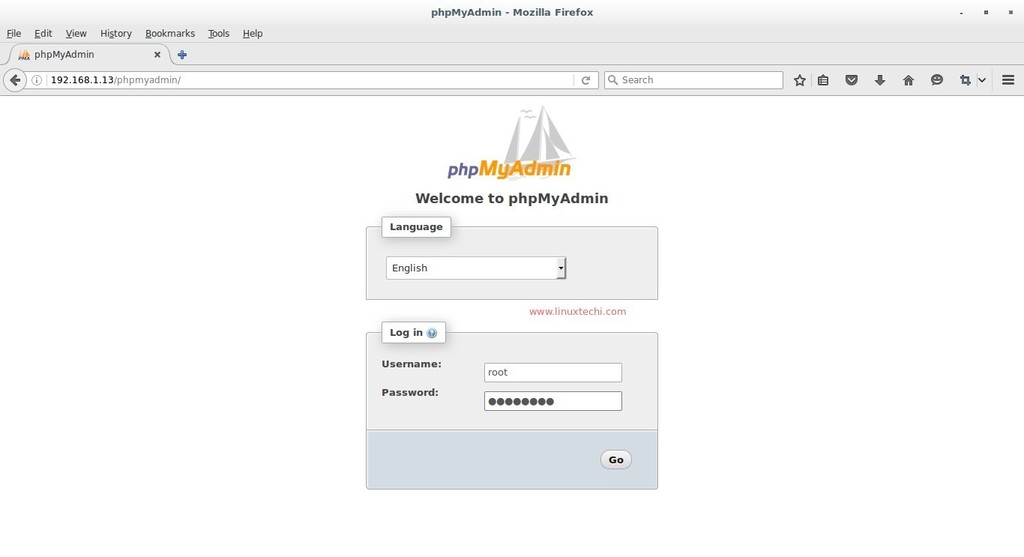
当我们点击“Go”的时候,将会重定向到如下所示的 ‘phpMyAdmin’ web界面。
到现在,LAMP 方案已经被成功安装并可以使用了,欢迎分享你的反馈和评论。