
折腾了将近3个小时!终于把MySQL的主从同步给配置成功了!
网上的不少例子都行不通(也许是版本问题).
官网看了一下原版的tutorial,还是比较懵逼.....
最后,通过官网的教程和自己的摸索,终于弄好mysql 主从复制了..
在此记录一下.
1.环境:
1.1.vmware 12
1.2.ubuntu14.04
1.3.Master Ip:192.168.150.130
1.4.Slave Ip:192.168.150.131
也就是两台虚拟机.之间的主从同步.
2.步骤:
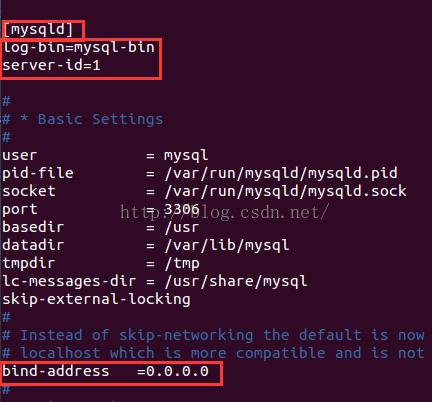
2.1.在Master上,修改my.cnf,将bind-address设为0.0.0.0,允许任意ip连接.
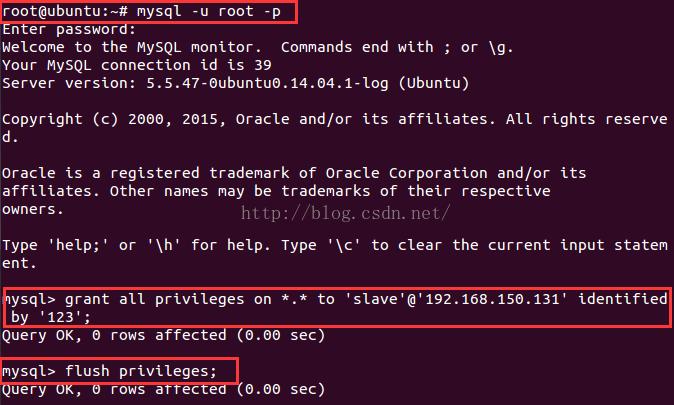
2.2.在Master上,进入mysql,设置权限.
mysql > grant all privileges on *.* to 'slave'@'192.168.150.131' identified by '123';
mysql > flush privileges;
2.3.Slave输入以下命令测试能否连接Master.
root@ubuntu:~# mysql -h 192.168.150.130 -u slave -p
2.4.Master 配置修改:
2.4.1.打开my.cnf
root@ubuntu:~# vi /etc/mysql/my.cnf
2.4.2.在[mysqld]下一行,添加:
2.1 Master的配置:
2.1.1.打开/etc/mysql/my.cnf,将[mysqld]下的"bind-address"设为0.0.0.0,允许任意ip连接.然后,依然在[mysqld]下,添加:log-bin=mysql-bin和server-id=1.如图:
2.1.2.进入mysql,设置权限
2.1.3.获取Master状态,待会设置Slave的时候会用到:在mysql命令行下,输入:show master status;显示的表格中的file和position待会会用到.
注意,如果是生产或测试环境下进行主从配置,则需要先锁表:(flush tables with read lock),最后记得(unlock tables)

2.2.Slave的配置:
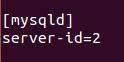
2.2.1.打开/etc/mysql/my.cnf,将[mysqld]下添加:server-id=2.如图:
2.2.2.进入mysql命令行,输入:
change master to master_host='192.168.150.130', master_user='slave', master_password='123', master_log_file='mysql-bin.000013', master_log_pos=333;
2.2.3.servicfe mysql restart,重启mysql
2.2.4.进入mysql 输入"show slave status\G;"
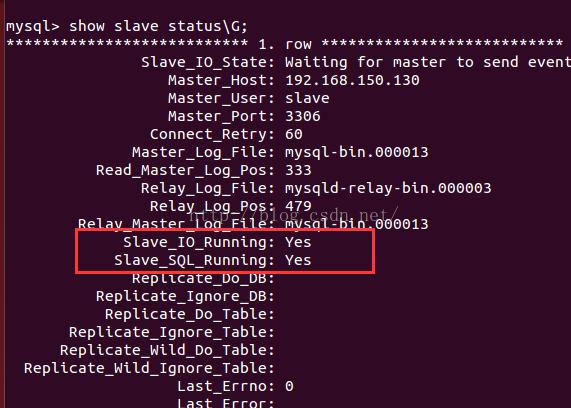
如图,图中的2个值为yes即代表设置成功!
去Master修改数据,然后到Slave上select试试吧!
参考资料(官网教程):http://dev.mysql.com/doc/refman/5.5/en/replication-howto.html