
这个本身我已经安装好了,然后这里有现成的环境ova格式,直接用虚拟机打开然后设置网卡为桥接模式就行了。
http://pan.baidu.com/s/1nvbfGhV 密码:z80r
方法呢还是记录一下:
1.肯定是安装虚拟机嘛
这个就不多说了,安装一个centos7最小模式就行
然后配置ssh
yum install openssh*
vi /etc/ssh/sshd_config
把下面两行取消注释
PermitEmptyPasswords no
PasswordAuthentication yes
这里我们就不限制root用户登录ssh了
确保这个是
PermitRootLogin yes
就是确保我们可以用root登录ssh
重启ssh
systemctl restart sshd.service
设置开机启动
systemctl enable sshd.service
添加防火墙策略
firewall-cmd --permanent --zone=public --add-service=ssh
firewall-cmd --reload
2.配置网卡(不然没法上网)
首先我们进入这个配置文件目录
cd /etc/sysconfig/network-scripts
一般是在这个目录下有个叫
ifcfg-enp0s3
这样一个文件,没有的话找找其他的相似的文件
然后我们打开它
vi ifcfg-enp0s3
这个时候我们还没有vim的,所以只好用vi这个简版的
然后将 ONBOOT=no 改为 ONBOOT=yes
保存后重启网卡:
service network restart
此时就可以上网了。
3.各种前期准备工作(参考)
我们先更新一下cache
yum makecache
升级一下
yum update
然后安装一下vim
yum install vim
安装ifconfig
yum install net-tools
这里生不升级看你,安不安vim也看你,没vim编辑配置文件很麻烦我感觉。
4.安装必要组件
我们先安装Apache的服务器
yum install httpd
然后启动Apache
service httpd start
然后看一下Apache的状态
service httpd status
然后设置httpd在运行级别为2、3、4、5的情况下都是on(开启)的状态
chkconfig --level 2345 httpd on
firewall-cmd --permanent --zone=public --add-service=http
安装MySQL,mysql在centos的源中是没有的,只有mariadb,一样
你想自己官网下,然后编译安装也可以,这里我就用mysql的分之兼容产品mariadb了
[root@localhost ~]# yum search mariadb
Loaded plugins: fastestmirror
Loading mirror speeds from cached hostfile
* base: centos.ustc.edu.cn
* extras: centos.ustc.edu.cn
* updates: centos.ustc.edu.cn
N/S matched: mariadb
mariadb-bench.x86_64 : MariaDB benchmark scripts and data
mariadb-devel.i686 : Files for development of MariaDB/MySQL applications
mariadb-devel.x86_64 : Files for development of MariaDB/MySQL applications
mariadb-embedded.i686 : MariaDB as an embeddable library
mariadb-embedded.x86_64 : MariaDB as an embeddable library
mariadb-embedded-devel.i686 : Development files for MariaDB as an embeddable library
mariadb-embedded-devel.x86_64 : Development files for MariaDB as an embeddable library
mariadb-libs.i686 : The shared libraries required for MariaDB/MySQL clients
mariadb-libs.x86_64 : The shared libraries required for MariaDB/MySQL clients
mariadb-server.x86_64 : The MariaDB server and related files
mariadb.x86_64 : A community developed branch of MySQL
mariadb-test.x86_64 : The test suite distributed with MariaD
Name and summary matches only, use "search all" for everything.
[root@localhost ~]#
我们安装这几个包就可以了
yum install mariadb.x86_64 mariadb-server.x86_64 mariadb-libs.x86_64 mariadb-devel.x86_64
启动mysql
service mysqld start
chkconfig --level 2345 mysqld on
然后设置mariadb的初始密码
mysqladmin -u root -p password <youmyqlpassword>
然后就可以登录了
mysql -uroot -p
创建一个数据库
create database dvwa;
quit;
然后我们安装PHP
yum install php.x86_64 php-mysql.x86_64 php-pear php-pear-DB php-gb
然后我们下载DVWA的包,先安装一个wget
yum install wget
wget https://github.com/ethicalhack3r/DVWA/archive/v1.9.tar.gz
cp v1.9.tar.gz /var/www/html/
cd /var/www/html
tar zxvf v1.9.tar.gz
mv DVWA-1.9 dvwa
然后我们用另一台机器的浏览器访问虚拟机的ip(这个时候确保机器网络设置为桥接,然后重启,然后再用ifconfig查看你虚拟机的ip,然后访问)
http://x.x.x.x/dvwa/setup.php
然后根据红色那些提示,设置环境
一般就是这样的
vim /etc/php.ini
将这几个设置成这样的
allow_url_fopen = On
allow_url_include = On
进入/var/www/html/dvwa/config目录下
先备份配置文件
cp config.inc.php config.inc.php.bak
改这么几个地方
vim config.inc.php
$_DVWA[ 'db_server' ] = 'localhost';
$_DVWA[ 'db_password' ] = '<youmysqlpassword';
$_DVWA[ 'recaptcha_public_key' ] = '6LdK7xITAAzzAAJQTfL7fu6I-0aPl8KHHieAT_yJg';
$_DVWA[ 'recaptcha_private_key' ] = '6LdK7xITAzzAAL_uw9YXVUOPoIHPZLfw2K1n5NVQ';
上面那个key大家可以自己生成,地址是
https://www.google.com/recaptcha/admin/create
我用example生成了两个新的
site_key: 6LePqhAUAAAAAH6Bn2okO9-8G-zNw46PNhotV4Q6
private_key: 6LePqhAUAAAAAMVqhBbFr1NVA9H13FKyfAgBeZYx
网上教程最上面那两个key都一个抄一个的,满天飞了都
你也可以用下面这两个新的一样的
然后下面这个赋权可写
/var/www/html/dvwa/hackable/uploads
cd /var/www/html/dvwa/hackable/
chmod 777 uploads
/var/www/html/dvwa/external/phpids/0.6/lib/IDS/tmp/phpids_log.txt
cd /var/www/html/dvwa/external/phpids/0.6/lib/IDS/tmp
chmod 777 phpids_log.txt
ok。
最后这个我也没弄出来是这么回事。
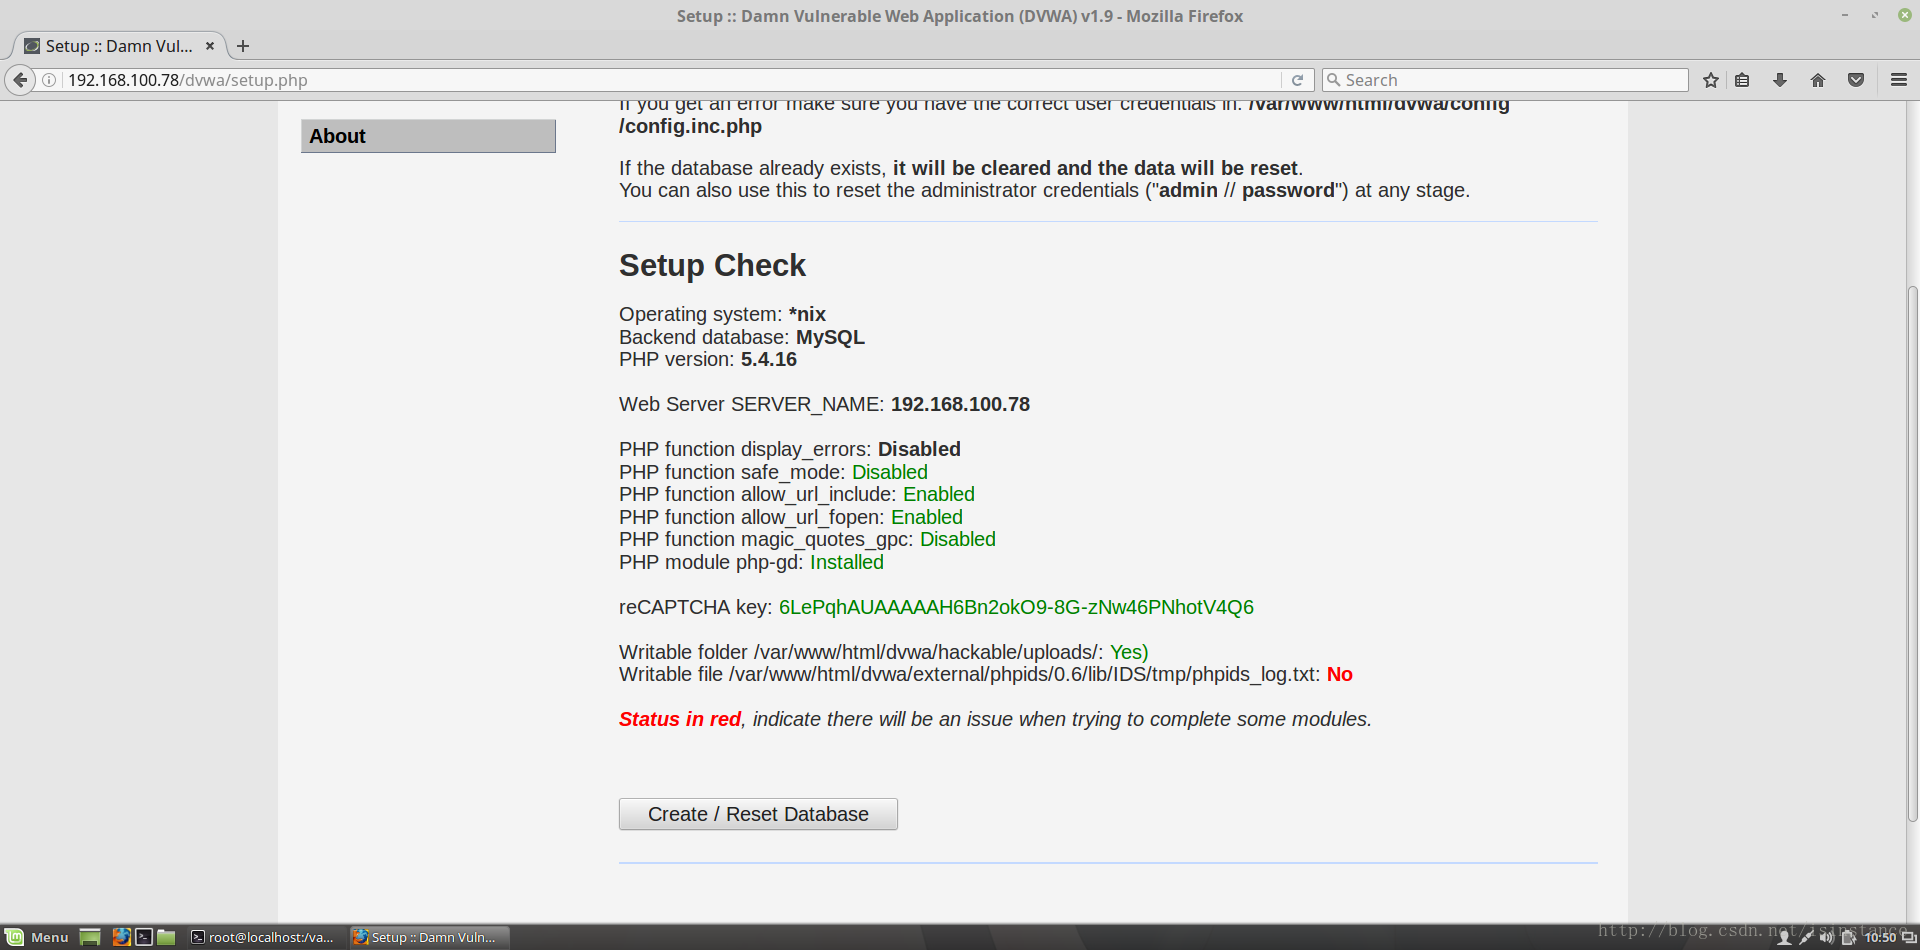
然后我们点一下Create/Reset那个按钮
然后就会自动跳到登录界面
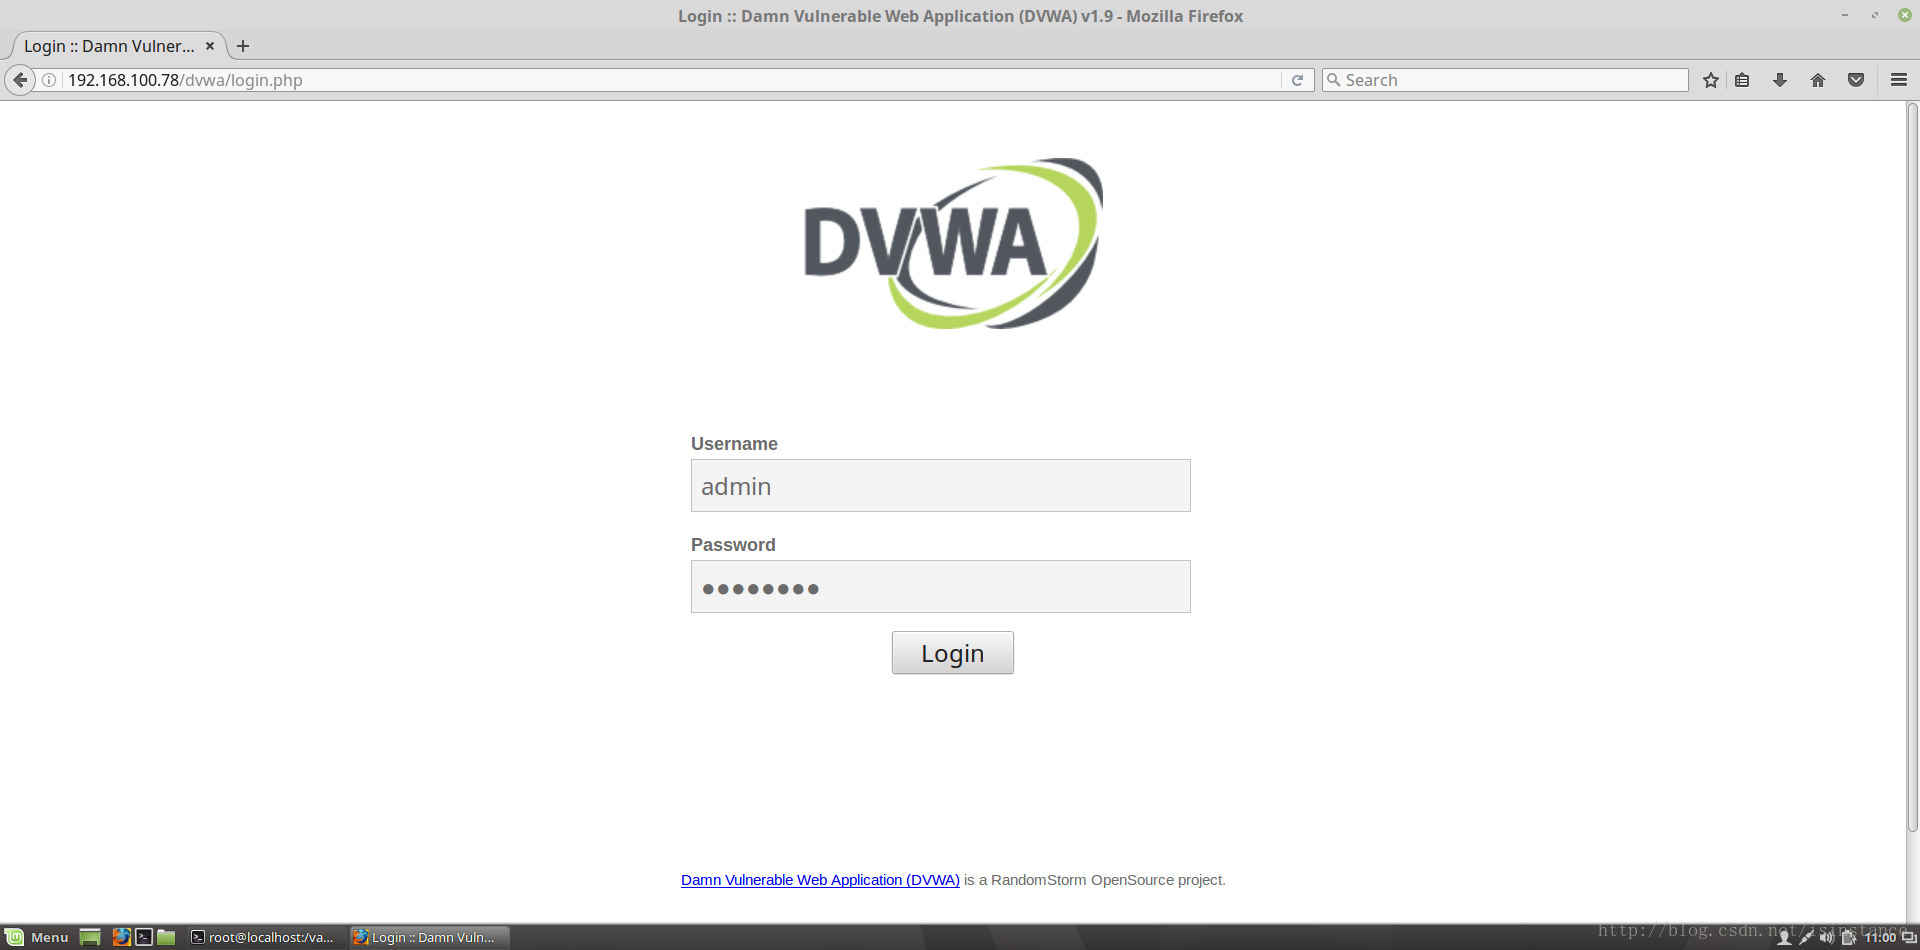
默认的登录密码是
admin
password
完了。