1、安装slony
去slony官网:http://www.slony.info/中下载合适的版本
例如:slony1-2.1.4.tar.bz2
解压:
tar –xvf slony1-2.1.4.tar.bz2
编译方法分三步:
./configure –with-pertlools
make
make install
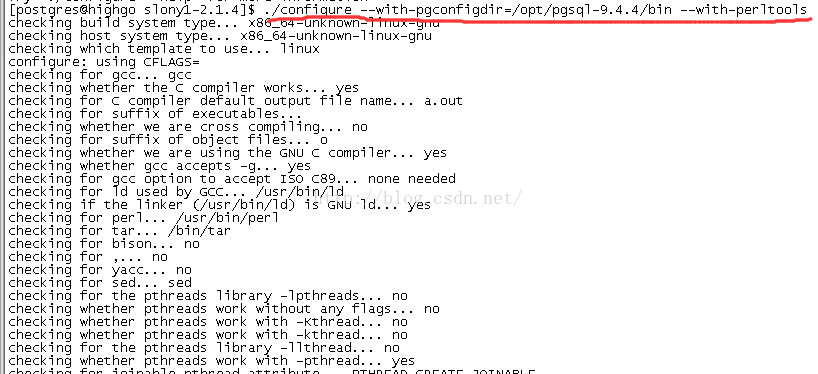
进入解压后的目录
编译

注:--with-pgconfigdir是指定pg_config文件的位置,也就是pg的安装目录
Slony-i中有一套perl脚本工具,名为altperscripts,它可以简化
Slony-i的配置,但是默认编译不会带上该脚本,如果带上需要加上—with-perltools
make

Make install

安装完成后,我们会发现slony-i总是安装到pg数据库的所在的目录

2.配置slony-i复制
两台redhat
192.168.100.77
192.168.100.99
在两台机器的数据库中都创建一个名字为slony的超级用户为slony-i使用
create user slony superuserpassword ‘slony’;
在192.168.100.77机器上创建一个名为master的数据库,作为复制的源数据
Create database master;
Alter database master ownerto slony;
在192.168.100.99机器上建一个名为slave的目标数据库,作为复制的目标数据库
create database slave;
alter database slave owner toslony;
后面的复制就是在192.168.100.77的master数据库与192.168.100.99的slave之间进行。
为演示复制,在master数据库和slave上都建一个测试表
create table synctab01(id intprimary key,note text);
修改pg_hba.conf文件 为了让两台机器能够互相访问
host all all 192.168.100.0/24 md5
为让配置生效
pg_ctl reload
改postgresql.conf中的listen_address=’*’
测试两台机器能否能相互的连接
psql –h192.168.100.99 -Uslony –d slave
将/usr/local/etc 目录下的slon_tools.conf-sample拷贝成slon_tools.conf,

然后进行修改配置

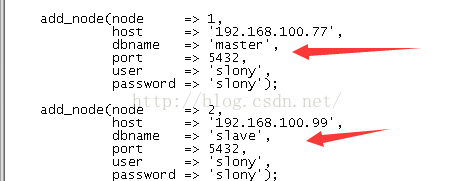
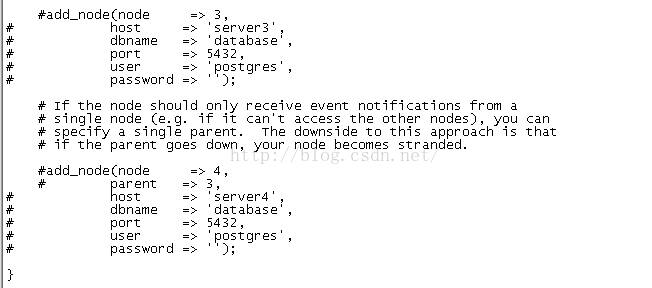
由于只有两个节点所以要把后面的节点注释掉,配置参数


设置配置复制集的配置项,主要配置要同步哪些表和序列,第一部分是要复制哪些有主键的表,把测试表加入其中

复制集的第二部分是米有主键,而又唯一键的表,由于不使用这部分没所以注释掉就可以了

最后是配置同步哪些序列,由于不使用,注释掉

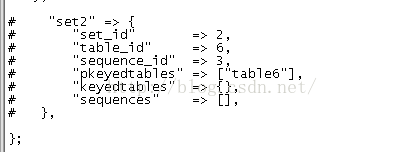
复制集2也不使用,同样注释掉

把配置完的slon_tools.conf文件拷贝到192.168.100.99
[root@highgo etc]# scp slon_tools.conf 192.168.100.99:/usr/local/etc
The authenticity of host'192.168.100.99 (192.168.100.99)' can't be established.
RSA key fingerprint is6d:d5:4e:23:a8:71:6a:3c:9f:95:41:61:1b:ae:ab:7c.
Are you sure you want tocontinue connecting (yes/no)? yes
Warning: Permanently added'192.168.100.99' (RSA) to the list of known hosts.
root@192.168.100.99'spassword:
slon_tools.conf 100% 5074 5.0KB/s 00:00
初始化集群,执行slonik_init_cluster | slonik
[postgres@highgo ~]$ slonik_init_cluster |slonik
<stdin>:6: Possibleunsupported PostgreSQL version (90404) 9.4, defaulting to 8.4 support
<stdin>:9: Possibleunsupported PostgreSQL version (90404) 9.4, defaulting to 8.4 support
<stdin>:10: Set upreplication nodes
<stdin>:13: Next:configure paths for each node/origin
<stdin>:16: Replicationnodes prepared
<stdin>:17: Pleasestart a slon replication daemon for each node
在192.168.100.77上启动slony守护进程
[postgres@highgo ~]$slon_start 1
Invoke slon for node 1 -/opt/pgsql-9.4.4/bin//slon -s 1000 -d2 cluster01 'host=192.168.100.77 dbname=master user=slony port=5432password=slony' > /home/postgres/slonylog/slony1/node1/master-2016-09-23.log2>&1 &
Slon successfully started forcluster cluster01, node node1
PID [5495]
Start the watchdog process aswell...
Slon_start1中的1代表master节点的节点号
同样启动192.168.100.99的slony守护进程
[postgres@highgo ~]$slon_start 2
Invoke slon for node 2 -/opt/pgsql-9.4.4/bin//slon -s 1000 -d2 cluster01 'host=192.168.100.99 dbname=slave user=slony port=5432password=slony' > /home/postgres/slonylog/slony1/node2/slave-2016-09-23.log2>&1 &
Slon successfully started forcluster cluster01, node node2
PID [2939]
Start the watchdog process aswell...
使用slonik_create_set 1 |slonik创建数据集
[postgres@highgo ~]$slonik_create_set 1 | slonik
<stdin>:11:Subscription set 1 created
<stdin>:12: Addingtables to the subscription set
<stdin>:16: Add primarykeyed table public.synctab01
<stdin>:19: Addingsequences to the subscription set
<stdin>:20: All tablesadded
使用slonik_subscribe_set 1 2| slonik增加数据订阅者,其中1代表同步集号,第二数字2代表数据订阅者的节点号
[postgres@highgo ~]$slonik_subscribe_set 1 2 | slonik
<stdin>:6: Subscribednodes to set 1
到此配置完成
在192.168.100.77的master库的表synctab01上插入记录
[postgres@highgo ~]$ psql
psql (9.4.4)
Type "help" forhelp.
postgres=# \c master
You are now connected todatabase "master" as user "postgres".
master=# insert intosynctab01 values (1,'111');
INSERT 0 1
到192.168.100.99的slave中查看数据是否同步过来
Start the watchdog process aswell...
[postgres@highgo ~]$ psql
psql (9.4.4)
Type "help" forhelp.
postgres=# \c slave
You are now connected todatabase "slave" as user "postgres".
slave=# select * fromsynctab01 ;
id | note
----+------
1 | 111
(1 row)
数据已经同步过来了。

