
Pritunl是开源的VPN管理面板,它使用OpenVPN协议,源代码托管在Github(https://github.com/pritunl/pritunl)。使用Pritunl搭建VPN的优势是图形化(Web接口)和简约化,它提供了相对简单的途径方便初级用户迅速搭建管理VPN。
CentOS 7 安装 Pritunl
1、安装MongoDB
MongoDB做为Pritunl的后台数据库。
1.关闭SELinux
2.安装MongoDB:http://www.linuxdiyf.com/linux/15491.html
2、安装pritunl
添加pritunl源:
vim /etc/yum.repos.d/pritunl.repo
写入如下内容:
[pritunl]
name=Pritunl Repository
baseurl=http://repo.pritunl.com/stable/yum/centos/7/
gpgcheck=1
enabled=1
添加key:
gpg --keyserver hkp://keyserver.ubuntu.com --recv-keys CF8E292A
gpg --armor --export CF8E292A > key.tmp; rpm --import key.tmp; rm -f key.tmp
安装pritunl:
yum install epel-release
yum install pritunl
启动服务:
systemctl start mongod
systemctl start pritunl
systemctl enable mongod
systemctl enable pritunl
3、使用pritunl
使用浏览器访问:https://Your-Server-IP
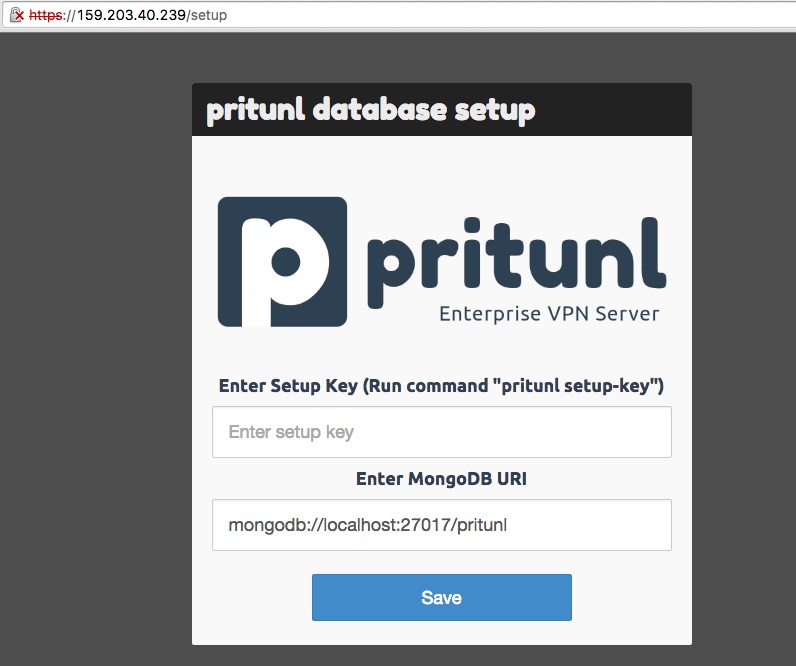
它使用的是自签名证书,会有警告信息,你可以使用Let’s Encrypt。
生成key,填入到上面的 “Enter setup key”:
pritunl setup-key
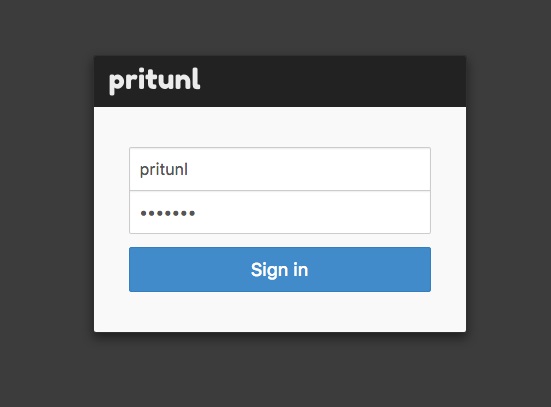
使用默认的用户名和密码登陆(pritunl:pritunl);
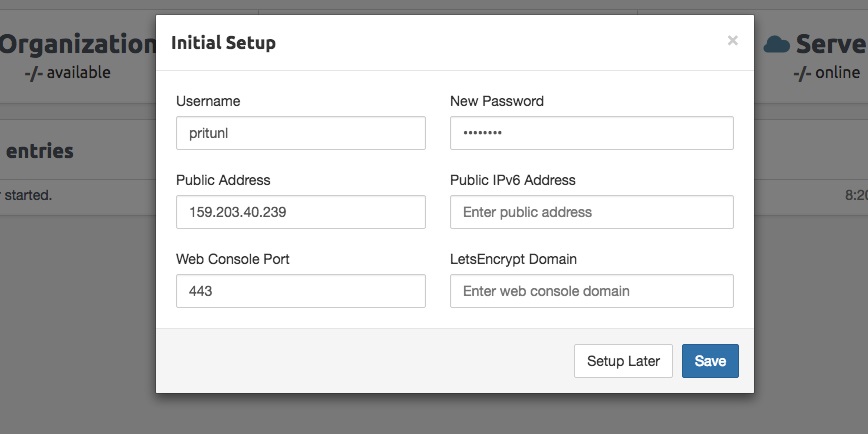
初始化设置:
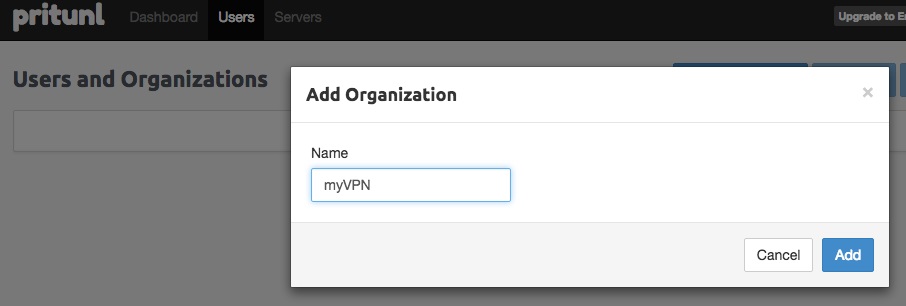
首先添加Organisation:
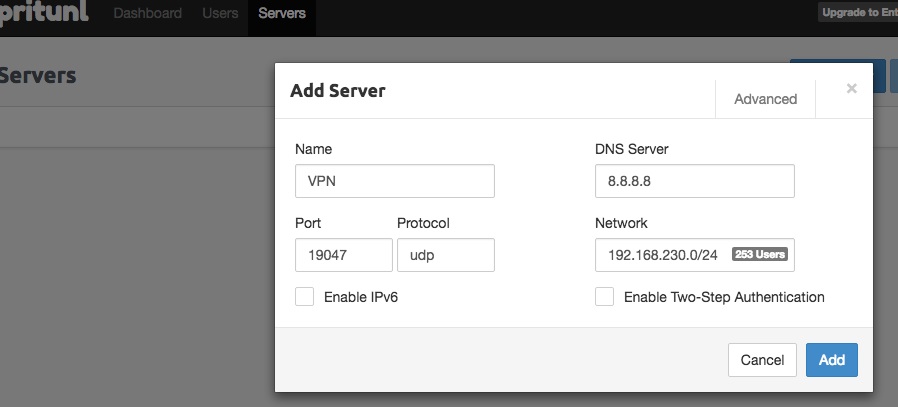
Add Server:
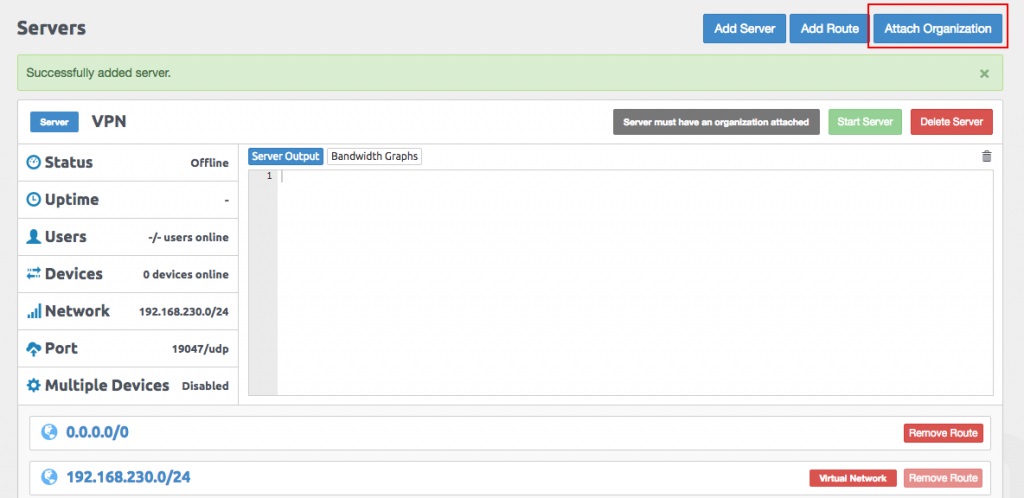
Attach Organisation:
启动服务(Start Server):
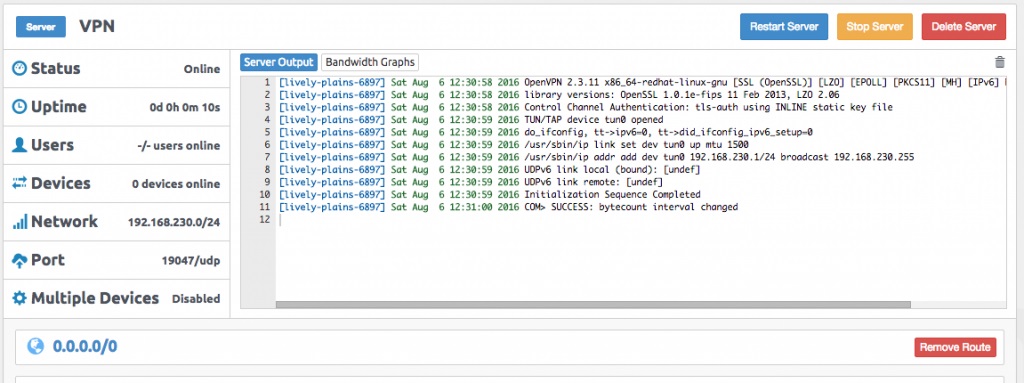
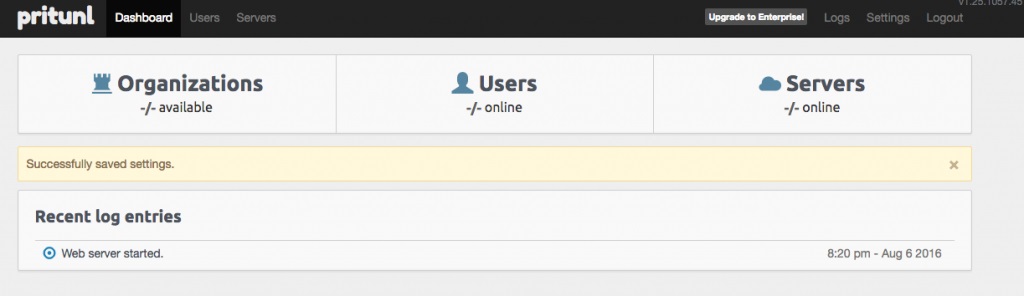
从上图可以看出服务器的状态,在线用户等等信息。
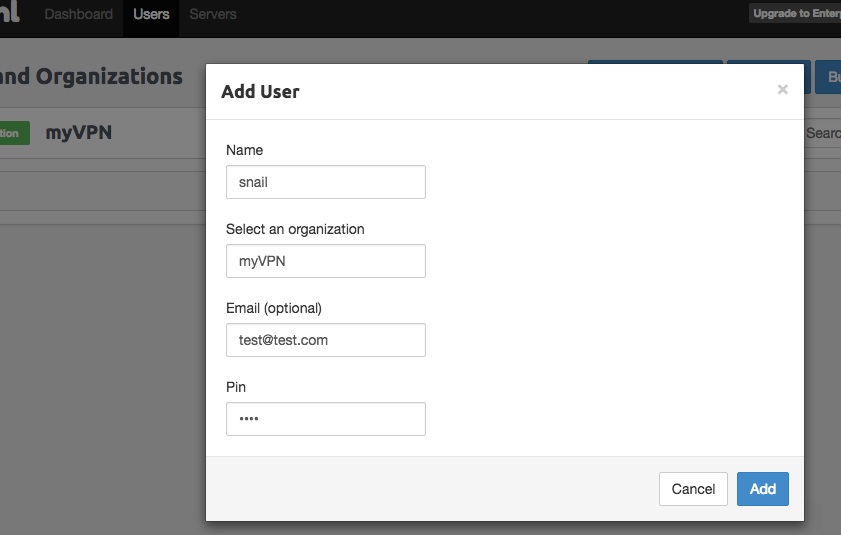
最后创建用户:
下载VPN客户端连接时需要的配置文件:

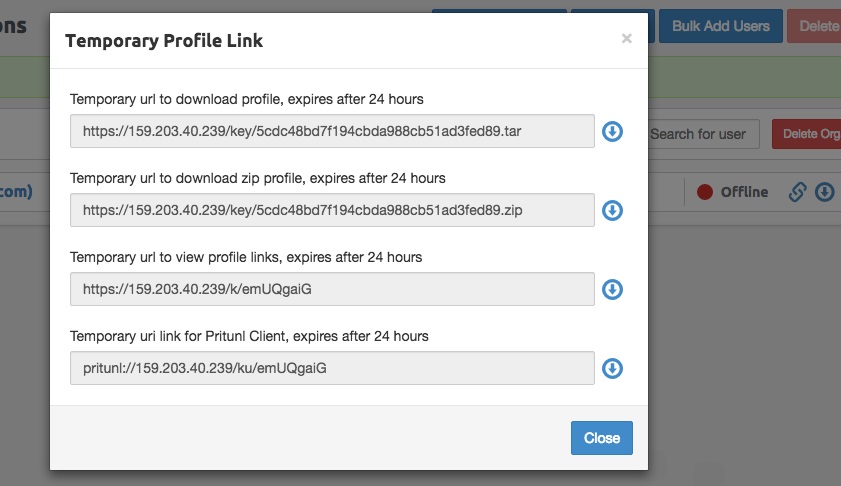
有了VPN配置文件客户端就可以连接OpenVPN服务器了。