
作为一名系统管理员,我经常需要用额外的硬盘来扩充存储空间或将系统数据从用户数据中分离出来。我将告诉你在将物理块设备加到虚拟主机的这个过程中,如何将一个主机上的硬盘加到一台使用 VMWare 软件虚拟化的 Linux 客户机上。
你可以显式的添加或删除一个 SCSI 设备,或者重新扫描整个 SCSI 总线而不用重启 Linux 虚拟机。本指南在 Vmware Server 和 Vmware Workstation v6.0 中通过测试(更老版本应该也支持)。所有命令在 RHEL、Fedora、CentOS 和 Ubuntu Linux 客户机 / 主机操作系统下都经过了测试。
步骤 1.添加新硬盘到虚拟客户机
首先,通过 vmware 硬件设置菜单添加硬盘。点击 “VM > Settings”
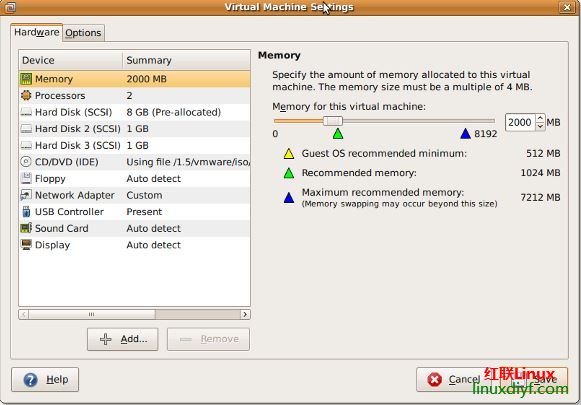
或者你也可以按下 CTRL + D 也能进入设置对话框。
点击 “Add” 添加新硬盘到客户机:
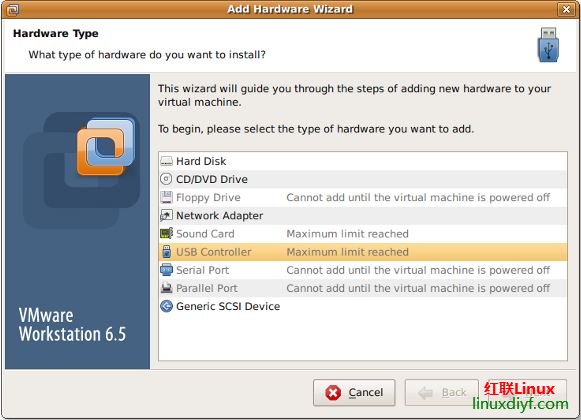
选择硬件类型为“Hard disk”然后点击 “Next”:
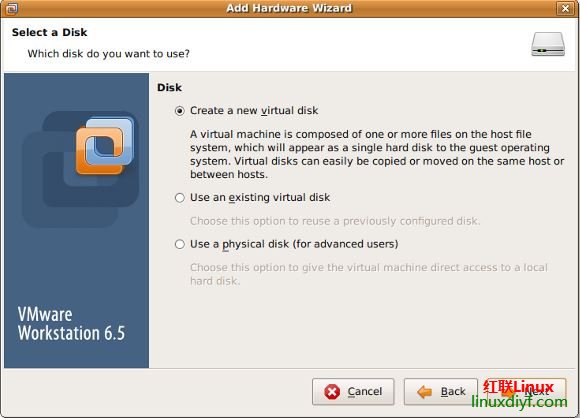
选择 “create a new virtual disk” 然后点击 “Next”:
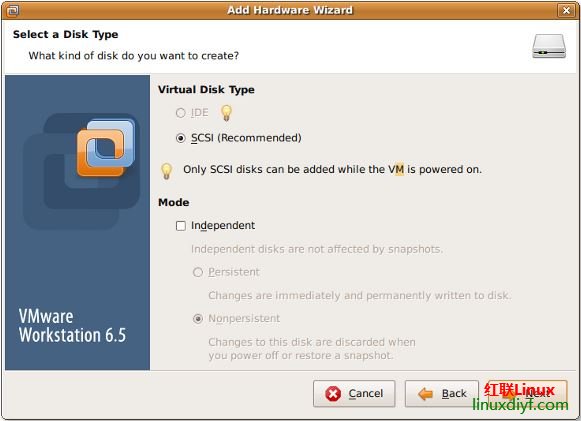
设置虚拟磁盘类型为 “SCSI” ,然后点击 “Next”:
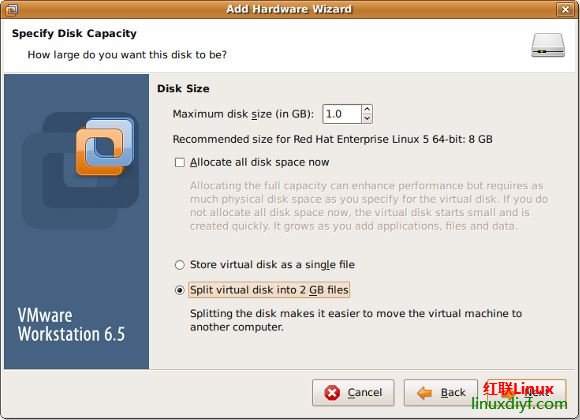
按需要设置最大磁盘大小,然后点击 “Next”
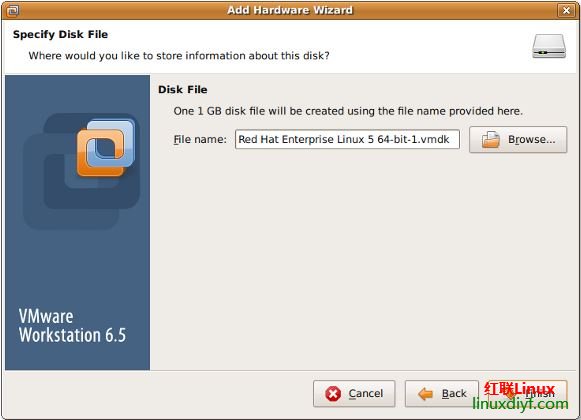
最后,选择文件存放位置然后点击 “Finish”。
步骤 2.重新扫描 SCSI 总线,在不重启虚拟机的情况下添加 SCSI 设备
输入下面命令重新扫描 SCSI 总线:
echo "- - -" > /sys/class/scsi_host/host# /scan
fdisk -l
tail -f /var/log/message
输出为:

你需要将 host# 替换成真实的值,比如 host0。你可以通过下面命令来查出这个值:
# ls /sys/class/scsi_host
输出:
host0
然后输入下面过命令来请求重新扫描:
echo "- - -" > /sys/class/scsi_host/host0/scan
fdisk -l
tail -f /var/log/message
输出为:
Jul 18 16:29:39 localhost kernel: Vendor: VMware, Model: VMware Virtual S Rev: 1.0
Jul 18 16:29:39 localhost kernel: Type: Direct-Access ANSI SCSI revision: 02
Jul 18 16:29:39 localhost kernel: target0:0:1: Beginning Domain Validation
Jul 18 16:29:39 localhost kernel: target0:0:1: Domain Validation skipping write tests
Jul 18 16:29:39 localhost kernel: target0:0:1: Ending Domain Validation
Jul 18 16:29:39 localhost kernel: target0:0:1: FAST-40 WIDE SCSI 80.0 MB/s ST (25 ns, offset 127)
Jul 18 16:29:39 localhost kernel: SCSI device sdb: 2097152 512-byte hdwr sectors (1074 MB)
Jul 18 16:29:39 localhost kernel: sdb: Write Protect is off
Jul 18 16:29:39 localhost kernel: sdb: cache data unavailable
Jul 18 16:29:39 localhost kernel: sdb: assuming drive cache: write through
Jul 18 16:29:39 localhost kernel: SCSI device sdb: 2097152 512-byte hdwr sectors (1074 MB)
Jul 18 16:29:39 localhost kernel: sdb: Write Protect is off
Jul 18 16:29:39 localhost kernel: sdb: cache data unavailable
Jul 18 16:29:39 localhost kernel: sdb: assuming drive cache: write through
Jul 18 16:29:39 localhost kernel: sdb: unknown partition table
Jul 18 16:29:39 localhost kernel: sd 0:0:1:0: Attached scsi disk sdb
Jul 18 16:29:39 localhost kernel: sd 0:0:1:0: Attached scsi generic sg1 type 0
Jul 18 16:29:39 localhost kernel: Vendor: VMware, Model: VMware Virtual S Rev: 1.0
Jul 18 16:29:39 localhost kernel: Type: Direct-Access ANSI SCSI revision: 02
Jul 18 16:29:39 localhost kernel: target0:0:2: Beginning Domain Validation
Jul 18 16:29:39 localhost kernel: target0:0:2: Domain Validation skipping write tests
Jul 18 16:29:39 localhost kernel: target0:0:2: Ending Domain Validation
Jul 18 16:29:39 localhost kernel: target0:0:2: FAST-40 WIDE SCSI 80.0 MB/s ST (25 ns, offset 127)
Jul 18 16:29:39 localhost kernel: SCSI device sdc: 2097152 512-byte hdwr sectors (1074 MB)
Jul 18 16:29:39 localhost kernel: sdc: Write Protect is off
Jul 18 16:29:39 localhost kernel: sdc: cache data unavailable
Jul 18 16:29:39 localhost kernel: sdc: assuming drive cache: write through
Jul 18 16:29:39 localhost kernel: SCSI device sdc: 2097152 512-byte hdwr sectors (1074 MB)
Jul 18 16:29:39 localhost kernel: sdc: Write Protect is off
Jul 18 16:29:39 localhost kernel: sdc: cache data unavailable
Jul 18 16:29:39 localhost kernel: sdc: assuming drive cache: write through
Jul 18 16:29:39 localhost kernel: sdc: unknown partition table
Jul 18 16:29:39 localhost kernel: sd 0:0:2:0: Attached scsi disk sdc
Jul 18 16:29:39 localhost kernel: sd 0:0:2:0: Attached scsi generic sg2 type 0
如何删除 /dev/sdc 这块设备?
除了重新扫描整个总线外,你也可以使用下面命令添加或删除指定磁盘:
# echo 1 > /sys/block/devName/device/delete
# echo 1 > /sys/block/sdc/device/delete
如何添加 /dev/sdc 这块设备?
使用下面语法添加指定设备:
# echo "scsi add-single-device <H> <B> <T> <L>" > /proc/scsi/scsi
这里
:主机
:总线(通道)
:目标 (Id)
:LUN 号
例如。使用参数 host#0,bus#0,target#2,以及 LUN#0 来添加 /dev/sdc,则输入:
# echo "scsi add-single-device 0 0 2 0">/proc/scsi/scsi
# fdisk -l
# cat /proc/scsi/scsi
结果输出:
Attached devices:
Host: scsi0 Channel: 00 Id: 00 Lun: 00
Vendor: VMware, Model: VMware Virtual S Rev: 1.0
Type: Direct-Access ANSI SCSI revision: 02
Host: scsi0 Channel: 00 Id: 01 Lun: 00
Vendor: VMware, Model: VMware Virtual S Rev: 1.0
Type: Direct-Access ANSI SCSI revision: 02
Host: scsi0 Channel: 00 Id: 02 Lun: 00
Vendor: VMware, Model: VMware Virtual S Rev: 1.0
Type: Direct-Access ANSI SCSI revision: 02
步骤 3.格式化新磁盘
现在使用 fdisk 并通过 mkfs.ext3 命令创建分区:
# fdisk /dev/sdc
### [if you want ext3 fs] ###
# mkfs.ext3 /dev/sdc3
### [if you want ext4 fs] ###
# mkfs.ext4 /dev/sdc3
步骤 4.创建挂载点并更新 /etc/fstab
# mkdir /disk3
打开 /etc/fstab 文件,输入:
# vi /etc/fstab
加入下面这行:
/dev/sdc3 /disk3 ext3 defaults 1 2
若是 ext4 文件系统则加入:
/dev/sdc3 /disk3 ext4 defaults 1 2
保存并关闭文件。
可选操作:为分区加标签
你可以使用 e2label 命令为分区加标签 。假设,你想要为 /backupDisk 这块新分区加标签,则输入:
# e2label /dev/sdc1 /backupDisk
Ubuntu挂载新硬盘并把home目录迁移到新硬盘:http://www.linuxdiyf.com/linux/25704.html
腾讯云Linux VPS新硬盘分区与挂载教程面板重装不丢失数据:http://www.linuxdiyf.com/linux/19903.html
Linux上挂载新硬盘详解:http://www.linuxdiyf.com/linux/18023.html
Ubuntu添加硬盘和修改USR到新硬盘挂载点:http://www.linuxdiyf.com/linux/17366.html
Linux下添加新硬盘或去除硬盘:http://www.linuxdiyf.com/linux/7984.html