为自己的网站配HTTPS这个事情拖了好久,前几天重新规划域名备份网站之后,直接把CentOS6换到了7。
然后重新配置了LNMP+wordpress,本来还想上个Docker版的gitlab,但1G内存似乎带不起来。
升级docker到最新版之后又把虚拟机搞挂了,没办法,又重新配置了一遍LNMP+wordpress。
HTTPS也是趋势,就参考几个文档配置一下,这里记录一下,以免后面重配时又要重新找文章。
然后重新配置了LNMP+wordpress,本来还想上个Docker版的gitlab,但1G内存似乎带不起来。
升级docker到最新版之后又把虚拟机搞挂了,没办法,又重新配置了一遍LNMP+wordpress。
HTTPS也是趋势,就参考几个文档配置一下,这里记录一下,以免后面重配时又要重新找文章。
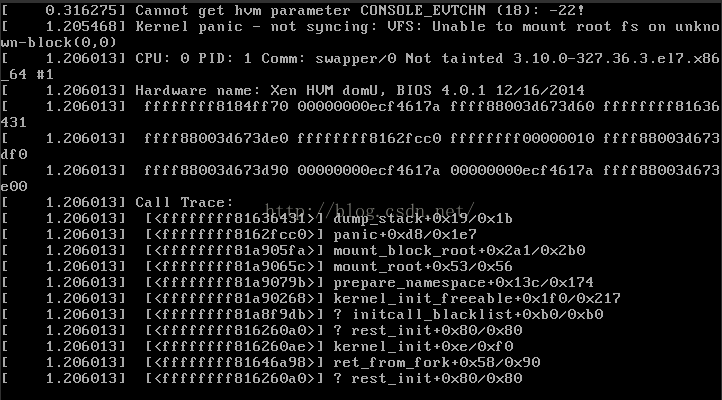
附一张阿里云挂了的进不去系统的界面,留个纪念:

下面是配置过程:
1.启用EPEL
阿里云的CentOS7不用配这个,暂时先不管。
2.安装certbot
yum install certbot
3.使用webroot模式生成证书
首先配置well-known(/.well-known/acme-challenge)的URL
编辑/usr/local/nginx/conf/vhost/的各个conf文件
编辑/usr/local/nginx/conf/vhost/的各个conf文件
在
location ~ /\.
{
deny all;
}
前面加上
location ~ /.well-known/acme-challenge/(.*) {
default_type text/plain;
}
然后执行
/etc/init.d/nginx reload
然后执行certbot的webroot模式生成证书
certbot certonly --webroot -w /home/wwwroot
/www.vvvtimes.com -d www.vvvtimes.com -w /home/wwwroot
/weixin.vvvtimes.com -d weixin.vvvtimes.com -w /home/wwwroot
/tools.vvvtimes.com -d tools.vvvtimes.com -w /home/wwwroot
/temp.vvvtimes.com -d temp.vvvtimes.com -w /home/wwwroot
/blog.vvvtimes.com -d blog.vvvtimes.com
其中-w指定网站所在目录,-d指定域名,下面这个是certbot官网给的例子
certbot certonly --webroot -w /var/www/example -d example.com -d www.example.com -w /var/www/thing -d thing.is -d m.thing.is
成功之后会提示pem文件的保存目录
IMPORTANT NOTES:
- Congratulations! Your certificate and chain have been saved at
/etc/letsencrypt/live/www.vvvtimes.com/fullchain.pem.
出现这个提示说明生成证书成功。
如果使用独立模式需要先停掉nginx,独立模式的命令如下
certbot certonly --standalone -d example.com -d www.example.com
4.nginx配置证书
编辑/usr/local/nginx/conf/vhost/的各个conf文件
在listen 80 后加
listen 443 ssl;
在root /home/wwwroot/www.vvvtimes.com; 后添加
ssl_certificate /etc/letsencrypt/live/www.vvvtimes.com/fullchain.pem;
ssl_certificate_key /etc/letsencrypt/live/www.vvvtimes.com/privkey.pem;
ssl_ciphers "EECDH+CHACHA20:EECDH+CHACHA20-draft:EECDH+AES128:RSA+AES128:EECDH+AES256:RSA+AES256:EECDH+3DES:RSA+3DES:!MD5";
ssl_protocols TLSv1 TLSv1.1 TLSv1.2;
ssl_prefer_server_ciphers on;
ssl_session_cache shared:SSL:10m;
注意将ssl_certificate和ssl_certificate_key改成你自己的证书目录
保存之后,使用reload命令重新载入配置文件
/etc/init.d/nginx reload
5.续期和更新
由于Let’s Encrypt证书只有90天有效期,可以使用crontab定时任务进行更新
crontab -e
编辑crontab任务,下面这个任务每个12小时续期一次,12小时也是官方推荐的频率
0 */12 * * * certbot renew --quiet --renew-hook "/etc/init.d/nginx reload"
更新之前可以下面这个命令模拟更新,看一下是否能更新成功
certbot renew --dry-run

