
刚安装的新的硬盘,由于没有格式化,所以在linux下无法识别这个硬盘,所以要先挂载这个硬盘。
1、添加屏硬盘,查看硬盘状况
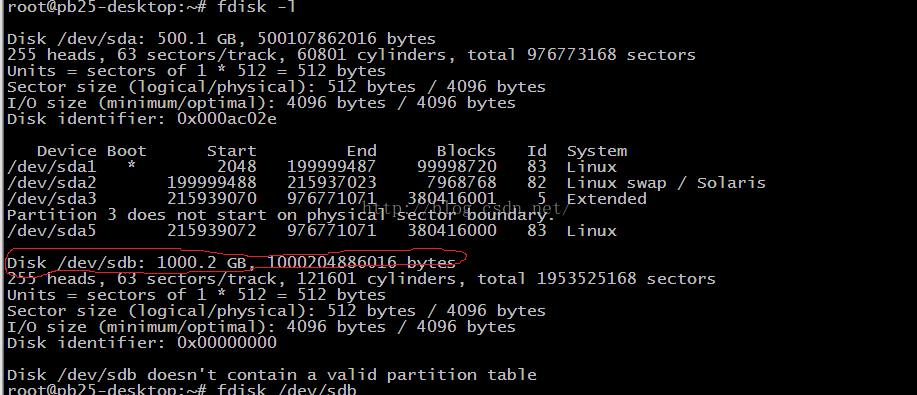
利用fdisk -l命令可以看出,多了个/dev/sdb大小为1T的盘。
2、用fdisk对/dev/sdb进行分区
root@pb25-desktop:~# fdisk /dev/sdb
Device contains neither a valid DOS partition table, nor Sun, SGI or OSF disklabel
Building a new DOS disklabel with disk identifier 0x4e4b62cd.
Changes will remain in memory only, until you decide to write them.
After that, of course, the previous content won't be recoverable.
Warning: invalid flag 0x0000 of partition table 4 will be corrected by w(rite)
The device presents a logical sector size that is smaller than the physical sector size. Aligning to a physical sector (or optimal I/O) size boundary is recommended, or performance may be impacted.
Command (m for help): n
Partition type:
p primary (0 primary, 0 extended, 4 free)
e extended
Select (default p): p
Partition number (1-4, default 1): 1
First sector (2048-1953525167, default 2048):
Using default value 2048
Last sector, +sectors or +size{K,M,G} (2048-1953525167, default 1953525167):
Using default value 1953525167
Command (m for help): w
The partition table has been altered!
Calling ioctl() to re-read partition table.
Syncing disks.
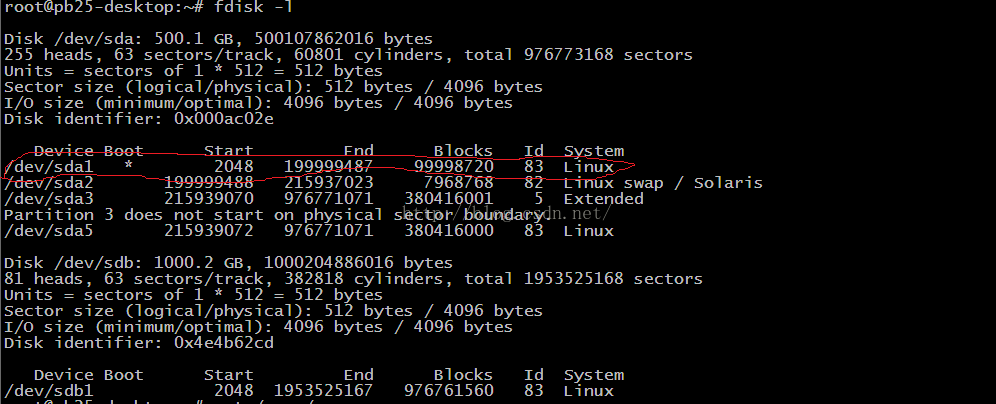
当Command (m for help):时选择n,Select (default p):时选择p,Partition number (1-4, default 1):时选择1,然后再次出现Command (m for help):时选择w。
然后再次利用fdisk -l命令查看分区情况,多出来了一个dev/sdb1的区,这个1就是在Partitionnumber (1-4, default 1)指定的1,如果选择2就为dev/sdb2。
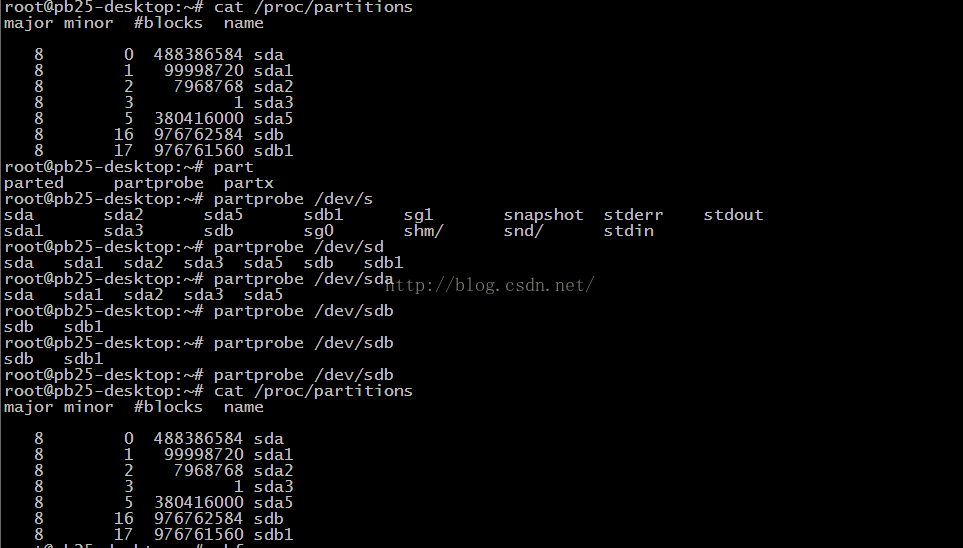
如果创建完之后,/proc/partitions 查看不到对应的分区,使用parprobe 命令刷新一下就可以了:
3、格式化/dev/sdb1分区
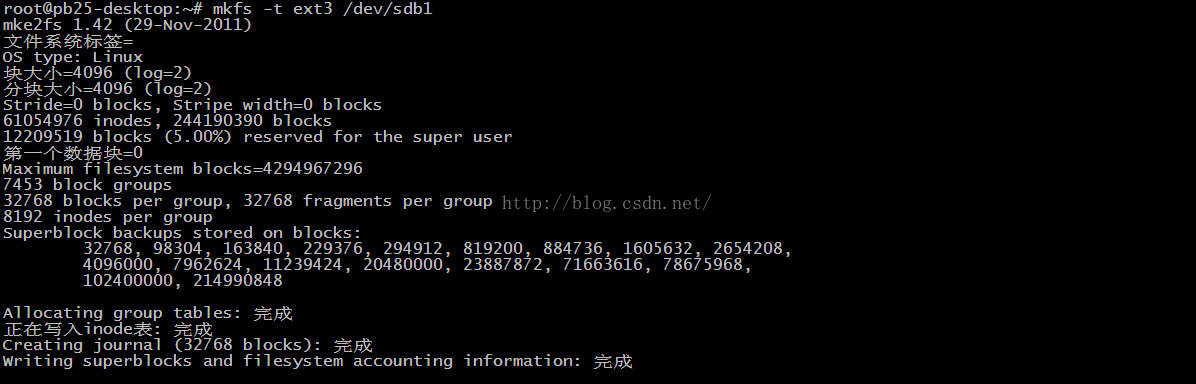
格式化分区利用mkfs -t ext3 /dev/sdb1进行格式化/dev/sdb1分区;
4、创建目录 并将 /dev/sdb1 挂在到该目录下

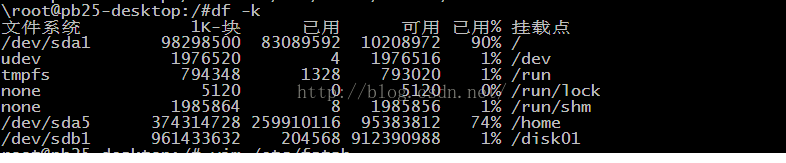
5、查看是否挂载成功
利用df -k命令进行查看
6、设置开机自动挂载
root@pb25-desktop:/# vim /etc/fstab
1 # /etc/fstab: static file system information.
2 #
3 # Use 'blkid' to print the universally unique identifier for a
4 # device; this may be used with UUID= as a more robust way to name devices
5 # that works even if disks are added and removed. See fstab(5).
6 #
7 # <file system> <mount point> <type> <options> <dump> <pass>
8 proc /proc proc nodev,noexec,nosuid 0 0
9 # / was on /dev/sda1 during installation
10 UUID=8afe0489-190e-47ce-a72e-76e53dbb5b52 / ext4 errors=remount-ro 0 1
11 # /home was on /dev/sda5 during installation
12 UUID=3c6604bd-c071-444f-b726-d4fc9bc9e101 /home ext4 defaults 0 2
13 # swap was on /dev/sda2 during installation
14 UUID=3f791267-c2bd-46c4-b7df-fb9cdf5c4eeb none swap sw 0 0
然后加上下面内容:/dev/sdb1 /disk01 ext3 defaults 0 0
1 # /etc/fstab: static file system information.
2 #
3 # Use 'blkid' to print the universally unique identifier for a
4 # device; this may be used with UUID= as a more robust way to name devices
5 # that works even if disks are added and removed. See fstab(5).
6 #
7 # <file system> <mount point> <type> <options> <dump> <pass>
8 proc /proc proc nodev,noexec,nosuid 0 0
9 # / was on /dev/sda1 during installation
10 UUID=8afe0489-190e-47ce-a72e-76e53dbb5b52 / ext4 errors=remount-ro 0 1
11 # /home was on /dev/sda5 during installation
12 UUID=3c6604bd-c071-444f-b726-d4fc9bc9e101 /home ext4 defaults 0 2
13 # swap was on /dev/sda2 during installation
14 UUID=3f791267-c2bd-46c4-b7df-fb9cdf5c4eeb none swap sw 0 0
15 /dev/sdb1 /disk01 ext3 defaults 0 0
这样就可以将硬盘挂载上了。