
ubuntu上安装mysql非常简单只需要几条命令就可以完成。
1.sudo apt-get install mysql-server
2.apt-get install mysql-client
3.sudo apt-get install libmysqlclient-dev
安装过程中会提示设置密码什么的,注意设置了不要忘了,安装完成之后可以使用如下命令来检查是否安装成功:
sudo netstat -tap | grep mysql
通过上述命令检查之后,如果看到有mysql 的socket处于 listen 状态则表示安装成功。
登陆mysql数据库可以通过如下命令:
mysql -u root -p
-u 表示选择登陆的用户名, -p 表示登陆的用户密码,上面命令输入之后会提示输入密码,此时输入密码就可以登录到mysql。
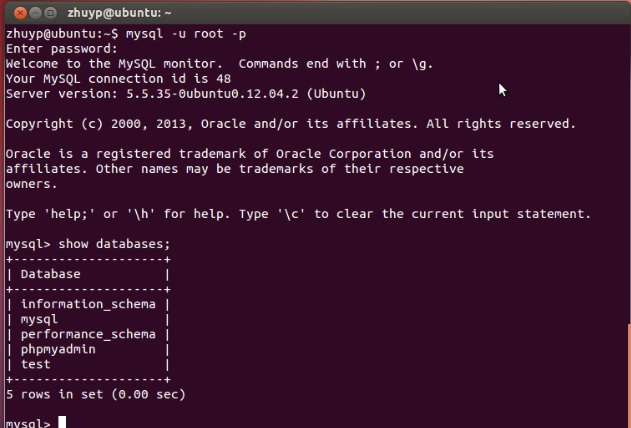
然后通过 show databases; 就可以查看当前的数据库。
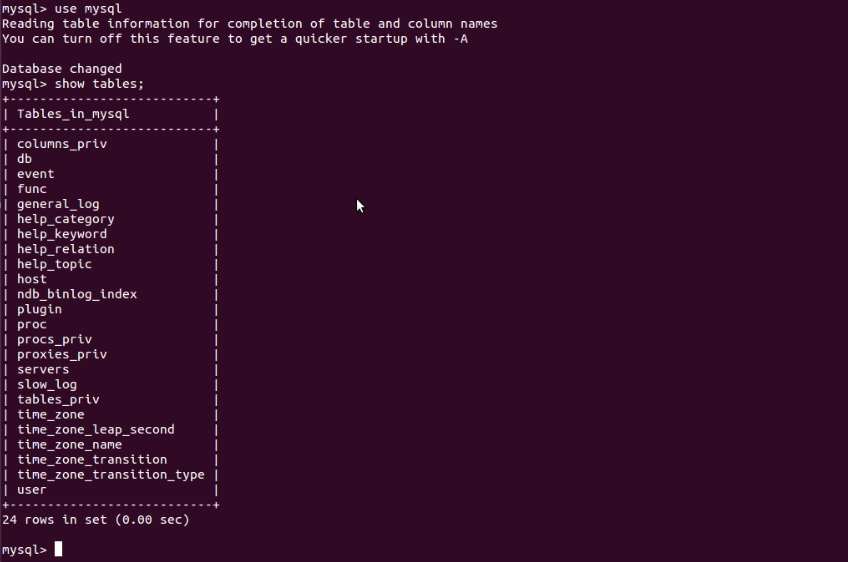
我们选择 mysql数据库就行下一步操作,使用use mysql 命令,显示当前数据库的表单:show tables
写一个简单的程序来访问该数据库,实现 show tables 功能:
#include <mysql/mysql.h>
#include <stdio.h>
#include <stdlib.h>
int main()
{
MYSQL *conn;
MYSQL_RES *res;
MYSQL_ROW row;
char server[] = "localhost";
char user[] = "root";
char password[] = "mima";
char database[] = "mysql";
conn = mysql_init(NULL);
if (!mysql_real_connect(conn, server,user, password, database, 0, NULL, 0))
{
fprintf(stderr, "%s\n", mysql_error(conn));
exit(1);
}
if (mysql_query(conn, "show tables"))
{
fprintf(stderr, "%s\n", mysql_error(conn));
exit(1);
}
res = mysql_use_result(conn);
printf("MySQL Tables in mysql database:\n");
while ((row = mysql_fetch_row(res)) != NULL)
{
printf("%s \n", row[0]);
}
mysql_free_result(res);
mysql_close(conn);
printf("finish! \n");
return 0;
}
编译代码的时候需要链接mysql的库,可以通过如下方式编译:
g++ -Wall mysql_test.cpp -o mysql_test -lmsqlclient
然后运行编译好的代码:
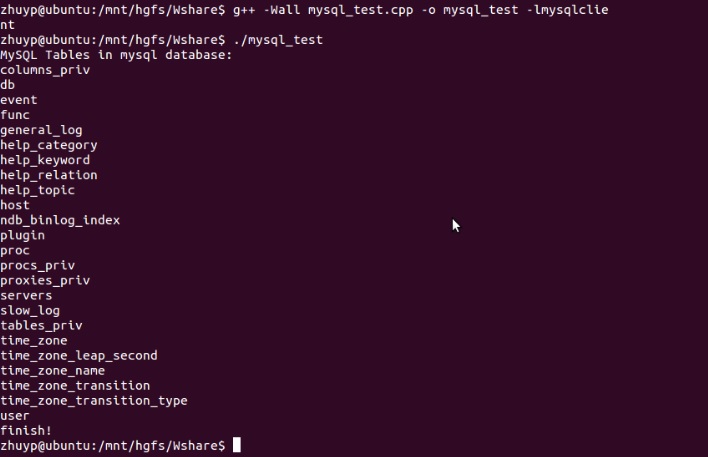
可见结果和使用SQL语句 show tables 是一样的。
Ununtu 15.04安装MySql(Django连接Mysql):http://www.linuxdiyf.com/linux/13783.html
Ubuntu15.04下MySQL5.6安装过程:http://www.linuxdiyf.com/linux/13250.html
Ubuntu 14.10下编译安装MySQL 5.6.23:http://www.linuxdiyf.com/linux/12221.html
Ubuntu 15.04安装配置Apache和mysql的方法:http://www.linuxdiyf.com/linux/13074.html
Ubuntu15.X和CentOS7之后-MySQL源码编译安装:http://www.linuxdiyf.com/linux/13144.html